
I know it’s a bit early for Christmas cards but…. Every year I tend to not have enough, so I’m starting early this year. I found this beautiful pack of paper that looks like water colour painting or alcohol ink. I don’t know why but I really wanted to make a Christmas cards out of it.

All the fun is in the reveal, to see this card in action please check out my FACEBOOK page, feel free to join if you would like to share your own crafty creations. You can also see a video of this card on my INSTAGRAM page.
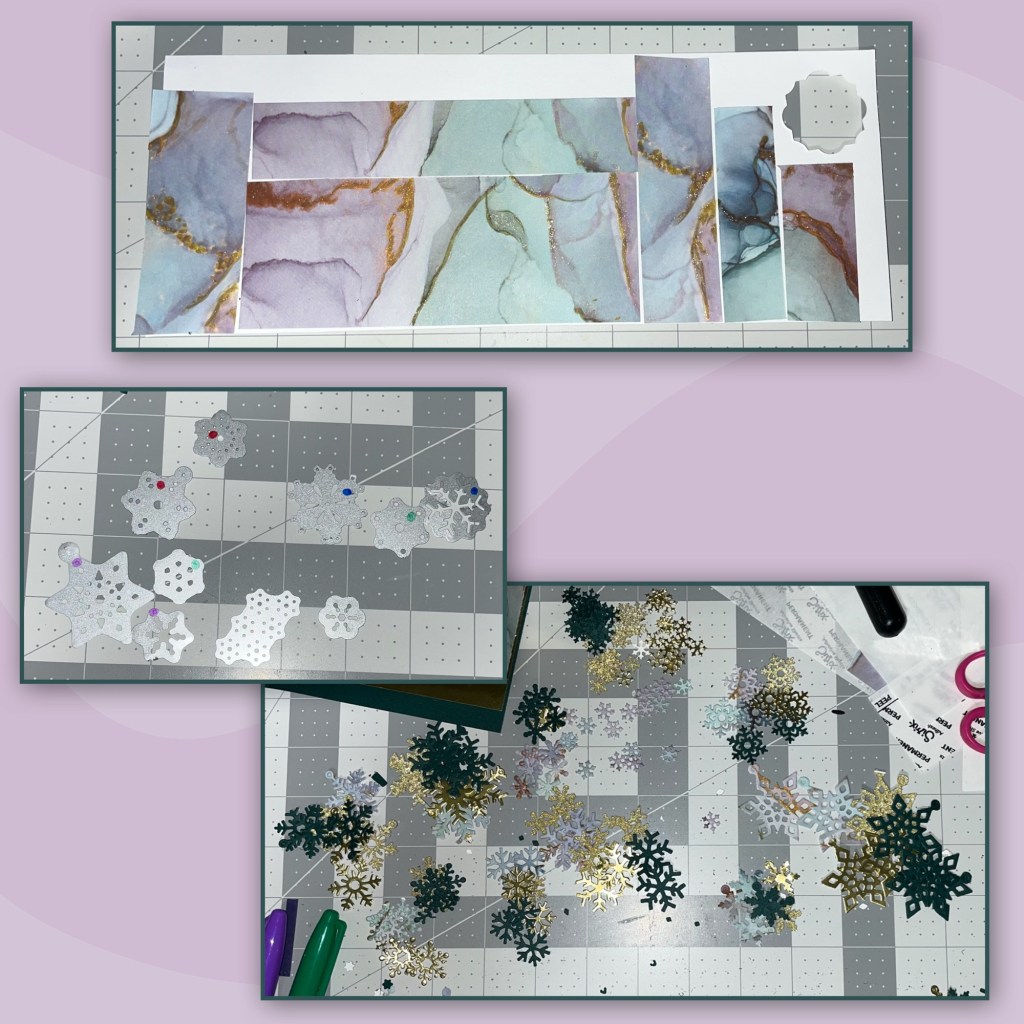
I decided to make this card to fit into a 5” x 7” envelope so the card base is slightly smaller. I was originally going to make a square card but was concerned that the mechanism I was going to use wouldn’t fit. I had to get creative with how I was going to add the gold layers as my gold cardstock wasn’t large enough to make a properly sized gold mat. I cut and layered as shown, cut out the centre of the gold as it will be needed later, add the gold frames to the card base.

I had bought a couple of the pretty patterned paper from Walmart. I really like this pattern. I needed 4 pieces of paper in total so I need to use the same paper from 2 packs as there are only 3 pages of each pattern per pack. The pattern has lines of gold in it, so I decided to use a Gold Wink of Stella pen to add some glitter to the gold in the paper to make it pop a bit more. Cut the paper to the size shown below. I was able to lay out the patterned paper so it looks like the pattern flows from one into the other.

The mechanism I was going to use was going to have to hide behind a panel. I wanted the pattern on the paper that was going to cover that panel with to line up with the pattern behind it. I laid down the large rectangle die from the Pop’n Swap set face up with a piece of tape behind it, also face up. Lay the patterned paper over the die making sure the pattern paper lines up with the pattern on the card base.
EDIT: the two photos on the bottom left should be reversed, top and bottom.
I cut out a gold piece and a green piece of card stock from the same die. Using a paper cutter I trimmed a 1/8” off the gold piece, also cutting out the middle. I cut the patterned paper to be 1/4” smaller. Then layer as shown.

I was scrolling through some of Karen Burnistons videos on YouTube and came across this VIDEO for her Pop’n’ Swap Quad Pop card. I cut out 2 Pop’n Swap mechanisms and altered as per Karens directions. Then added the panel to cover the mechanism. NOTE: I did not add the window to the front of the card like Karen did in her video.

I wanted to have a variety of snowflakes and I didn’t want to waste the pretty paper so I used double sided adhesive sheets to add the patterned paper to some thin white cardstock. I used snow flakes from several diesets ( I added sharpie dots to the back of the dies to help me remember which dies go back to which sets (sets will be listed at the bottom of this post. I cut snowflakes from the paper, green cardstock, the gold cardstock that I have been using and glitter gold cardstock.
I started adding the snowflakes to the mechanisms, checking for catch points as I’m adding them.

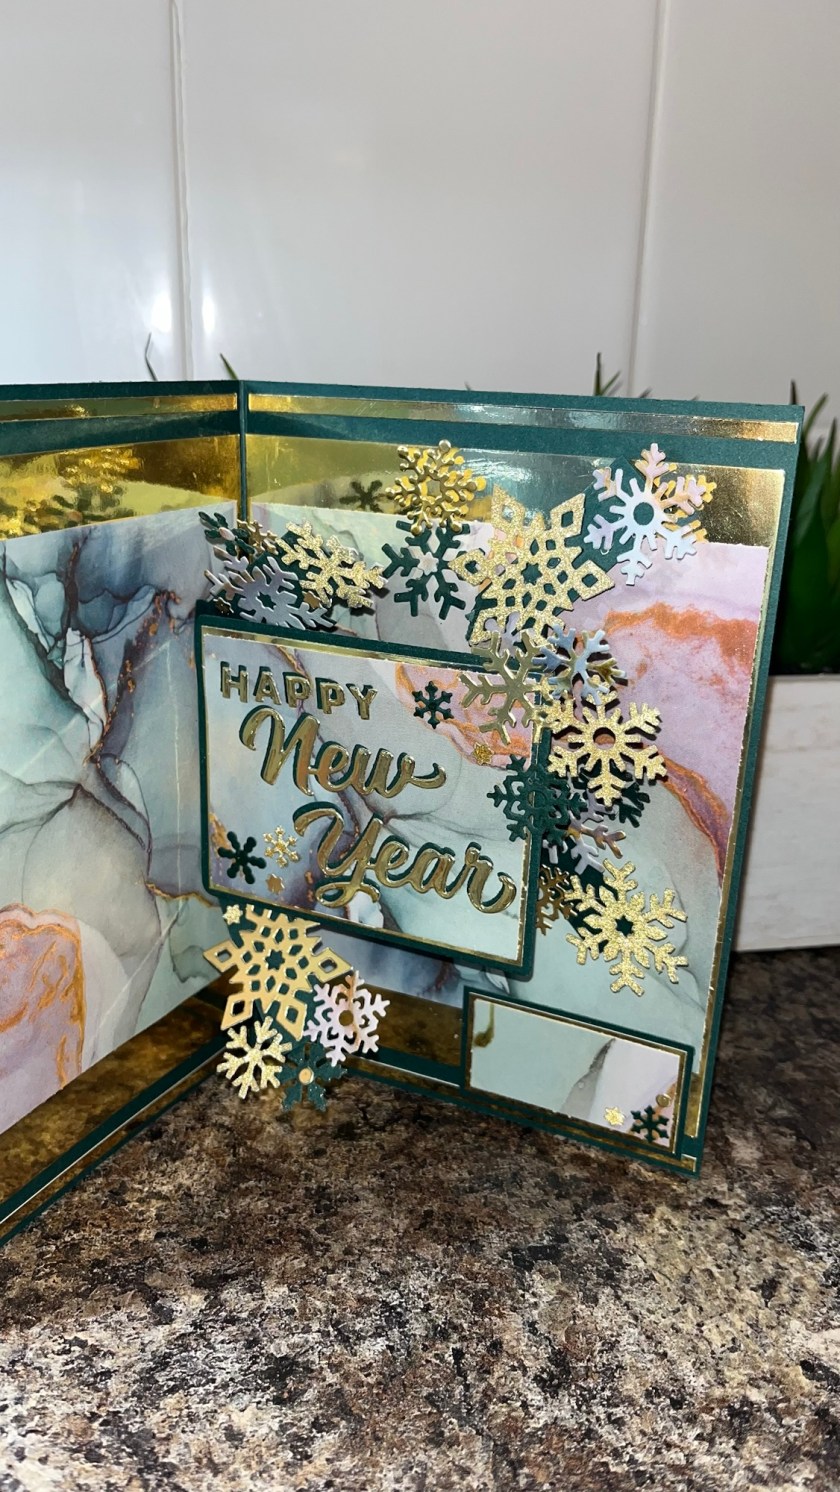
I didn’t like all the green above and below the gold frame so I cut some thin gold borders and adding them as shown.

I cut out the Happy New Year from the gold and green. I thought the shadow piece that comes with the Happy New Year would cover too much of the pretty paper so I just added a slight shadow with the green behind the gold. I add it to the pop up panel.

I cut some layers as shown below from the green, gold and the patterned paper to make a place to sign. I messed up on the purplish rectangle so I had to cut a new piece. I added to the bottom right corner and added a couple of little snowflakes.

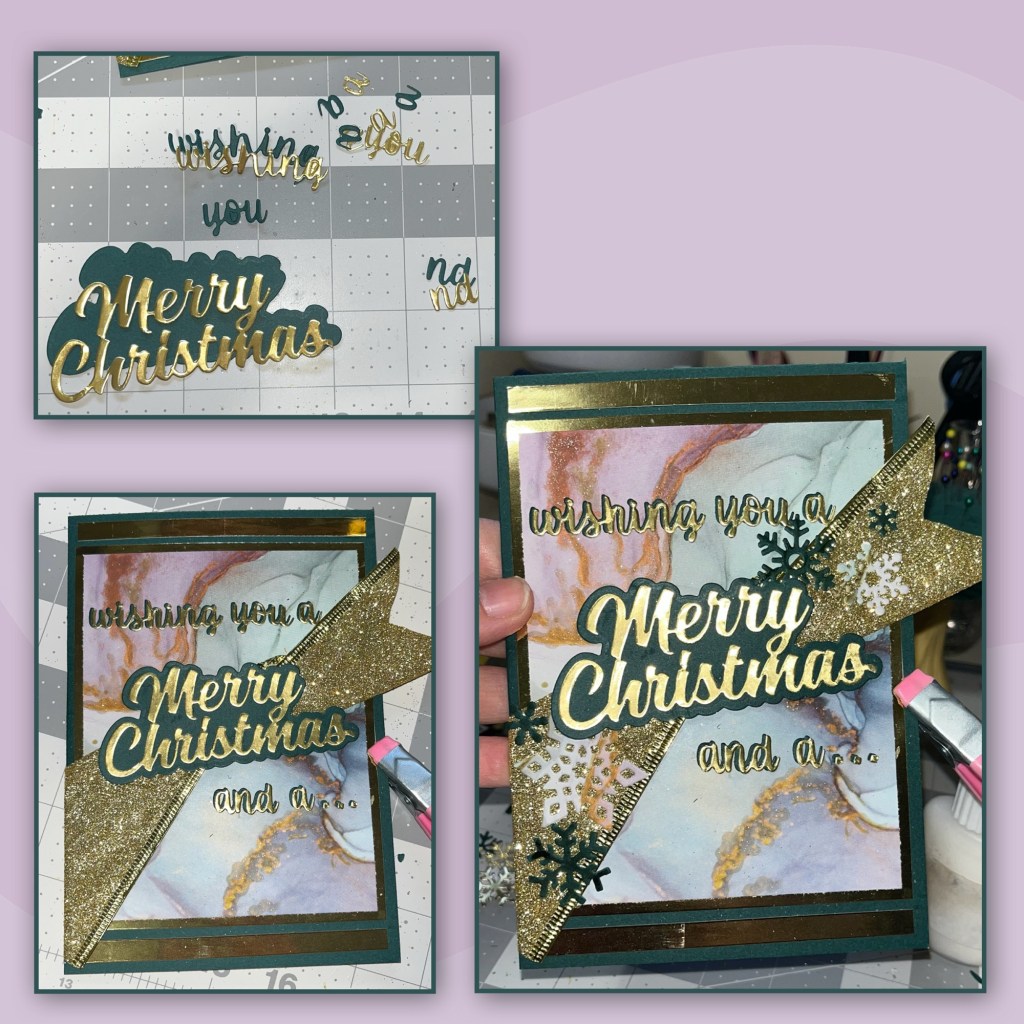
I had to get creative on the front, I only had 1 piece of gold cardstock left (I have some small scraps) and I wanted the appearance that the front panel had a gold border around it but the gold piece wasn’t big enough. I have the dimensions shown below. I cut the gold piece as shown on an angle. Then glued it behind the patterned paper, It’s hard to see in the photo but there is an obvious gap in the gold border.

I went to my ribbon box and found this wide gold glitter ribbon. Again I didn’t want to cover too much of the pretty paper so I twisted it in the middle. I cut a fish tale on the right side and wrapped the left side around the back. I also added gold borders to the top and bottom, sizes shown in pic.

To create this greeting I cut out pieces from the Merry Christmas, the Merry Christmas Shadow, Word set 18-Connectors, and the “nd” is from the Numbers set. I added the “a” to the “nd” to make the word “and”. I added the pieces as shown, then add a few snowflakes to the ribbon.
I was finding that the snowflakes on the top left arm were catching on the panel when closing the card. First I added a green matching snow flake behind to firm up the snowflake a bit more. It helped a bit but it would still get caught up every once in a while so I took 2 clear half pearls and put one near the top of the back of the panel and one just below the snowflake on the arm that was catching. The bubble helps as a spacer and the pieces now glide nicely without catching.
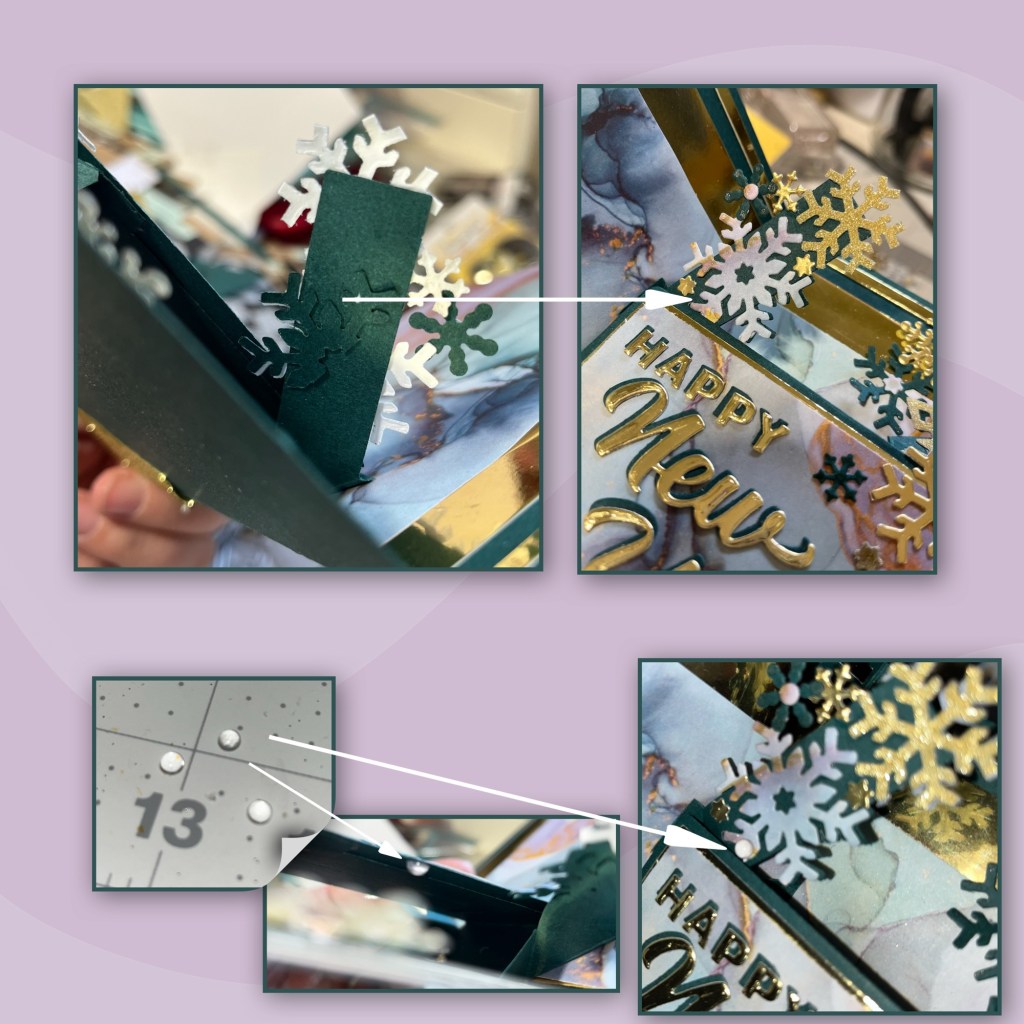
I added a few more snowflakes on the inside on the left side of the panel that covers the mechanism.

The snowflakes are from the following sets:
Other Tools used
