

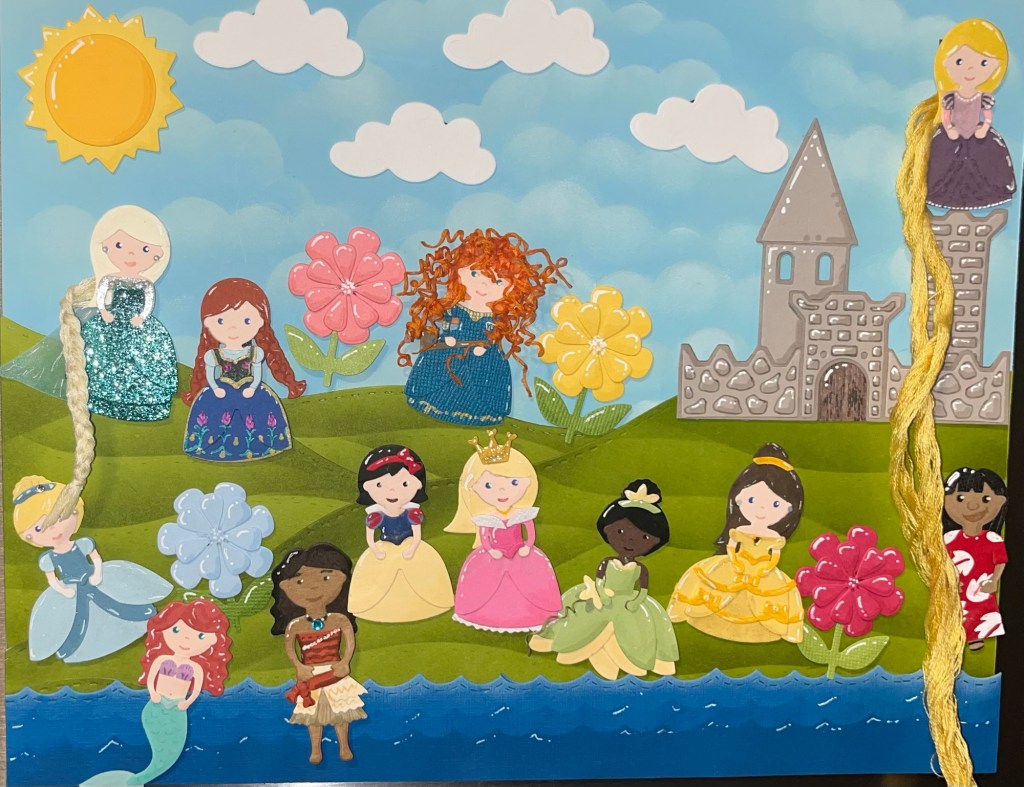
Over the years I have made different characters paper piecing different die cuts together, so I thought instead of giving directions on every blog post for characters because some of them will be duplicates. That I would make this page and just add all my characters here this will be a continued work in progress. Blog post going forward would be linked to this page to give the product listings and directions.
I am posting pictures, but don’t have the time to give all the directions today. I will add directions when I get the chance. If you see an image that you would like direction on, please feel free to message me and I will update that one as soon as possible.
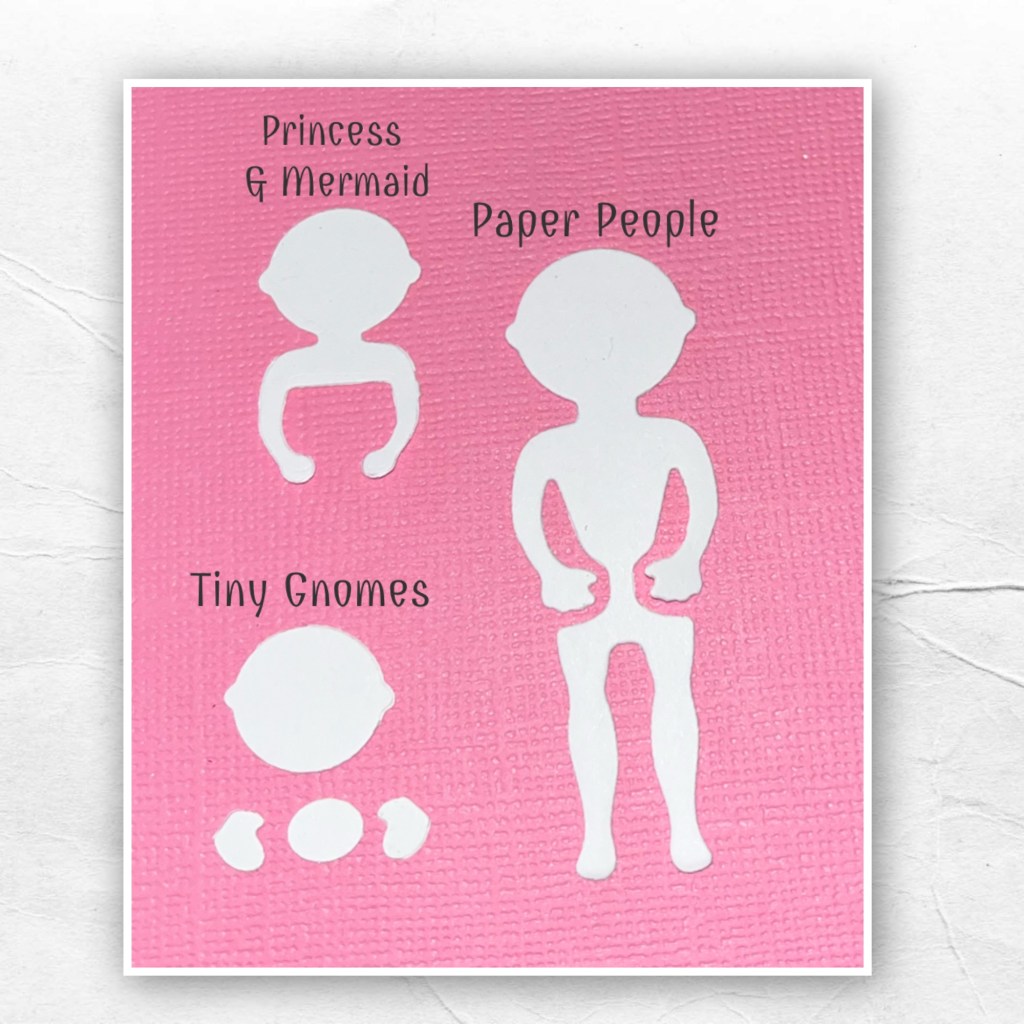
I thought I would make sense to show the pieces of each set so you can visualize the pieces I’m talking about.


And to show you, the size differences, here are the head and bodies from these three sets.
Cinderella

I only used pieces from the Princess and Mermaid die set. I assemble the dress using a medium shade of blue for the dress front and the lighter blue for the back as per Karen directions.
To make the dress puffy I cut another dress front from the light blue and trimmed off the bottom pieces and added as shown. Next I added the Waistband 2. I cut off the light blue shoulder puffs and added as well.
I trimmed the Hair 2 and added the seashell to the top as shown for her hair. Hairband is the waistband 1 turned upside down.
To make the gloves I cut out her arms from white then trimmed.
I added shading with a Versa Mark Marker, and highlights with a white Gelly Roll pen. I also added Wink of Stella to give her some shimmer. Her earrings are itty-bitty little pearls that were meant for manicures lol bought off Amazon.
——————————————————
Belle

I used mostly dies from the Princess and Mermaid set.
I cut and assembled the dress front and back as per Karen’s directions.
I trimmed the neckline as shown. To make the extra poufs I cut the dress front again, cut off the top and cut the bottom in half and added to the back. To make the trim I used several pieces cut from the Waistbands 1 and 2 along with the bows from the Tiny Gnomes
To make her hair look thicker I cut out 2 pieces of Hair 1 and the seashell and attached as shown. I used waistband 1 turned upside down for a hair band.
I added shading with a Versa Mark Marker, and highlights with a white Gelly Roll pen. I also added Wink of Stella to add shimmer. Her little earrings and the gem on her neck line are from cheap manicure sets I bought off of Amazon.
—————————————————-
Snow White

She is pretty easy. Basically just the pieces from the Princess and Mermaid set, cut out in the colours shown with the and assembles as per Karen’s directions. Hair style 2 with the waistband 1 as a headband. The red bow is from the Tiny Gnomes set.
I added shading with a Versa Mark Marker, and highlights with a white Gelly Roll pen
——————————————————
Ariel

Aurora

Rapunzel

Tiana

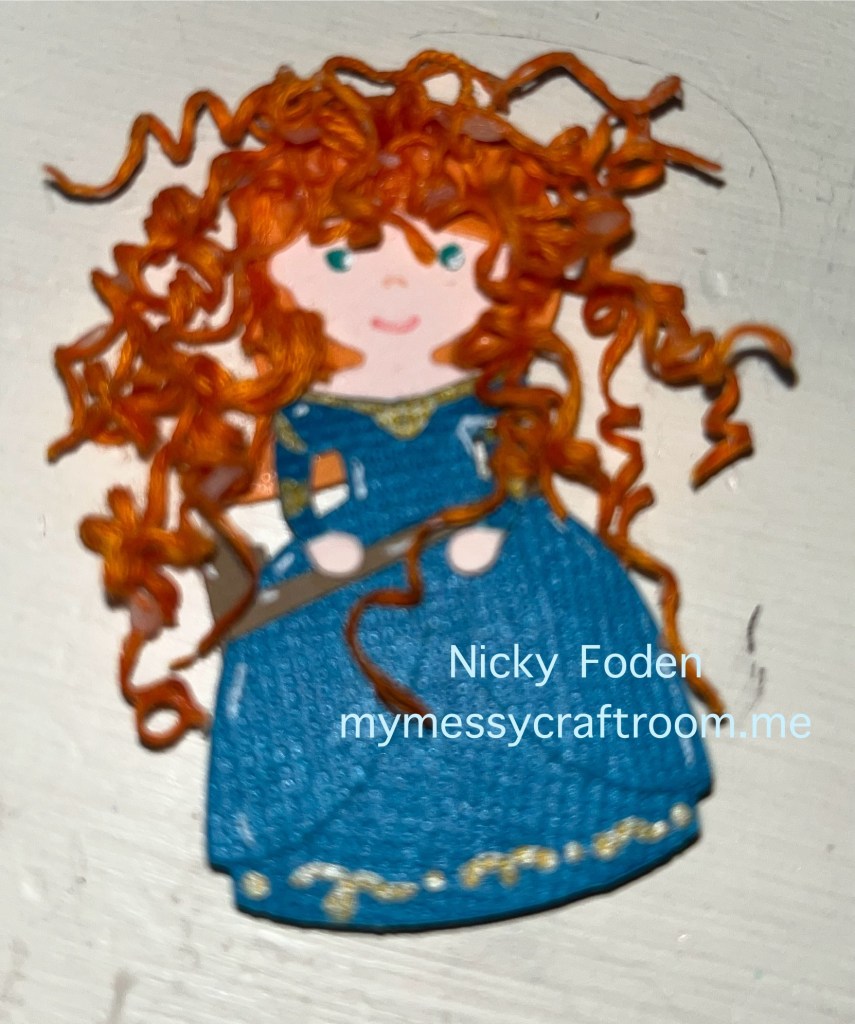
Merida
Elsa

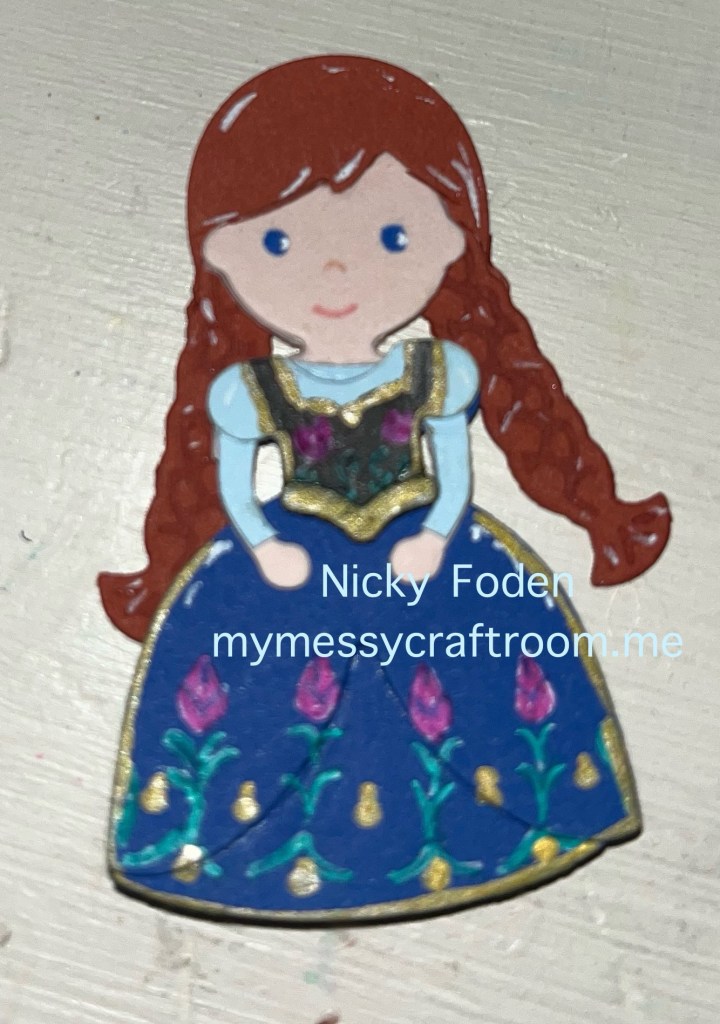
Anna
Moana

Lilo


WOW. Making these magnets for interactive is impressive. And you continued with making each princess, with details on how you made them. I was talking about felt boards the other day, this is so much better.
I tried using the link from KB Blog(where I first saw this fairytale scene) it didn’t work. Fortunately I have your paged saved.
side note: I’m team both. 😉
LikeLiked by 1 person