

Hello, today I am sharing a cruise ship card in shades of blue. I made a couple of booboos so I took the time to share how I fixed them.

All the fun is in the reveal, to see this card in action please check out my FACEBOOK page, feel free to join if you would like to share your own crafty creations. You can also see a video of this card on my INSTAGRAM page.
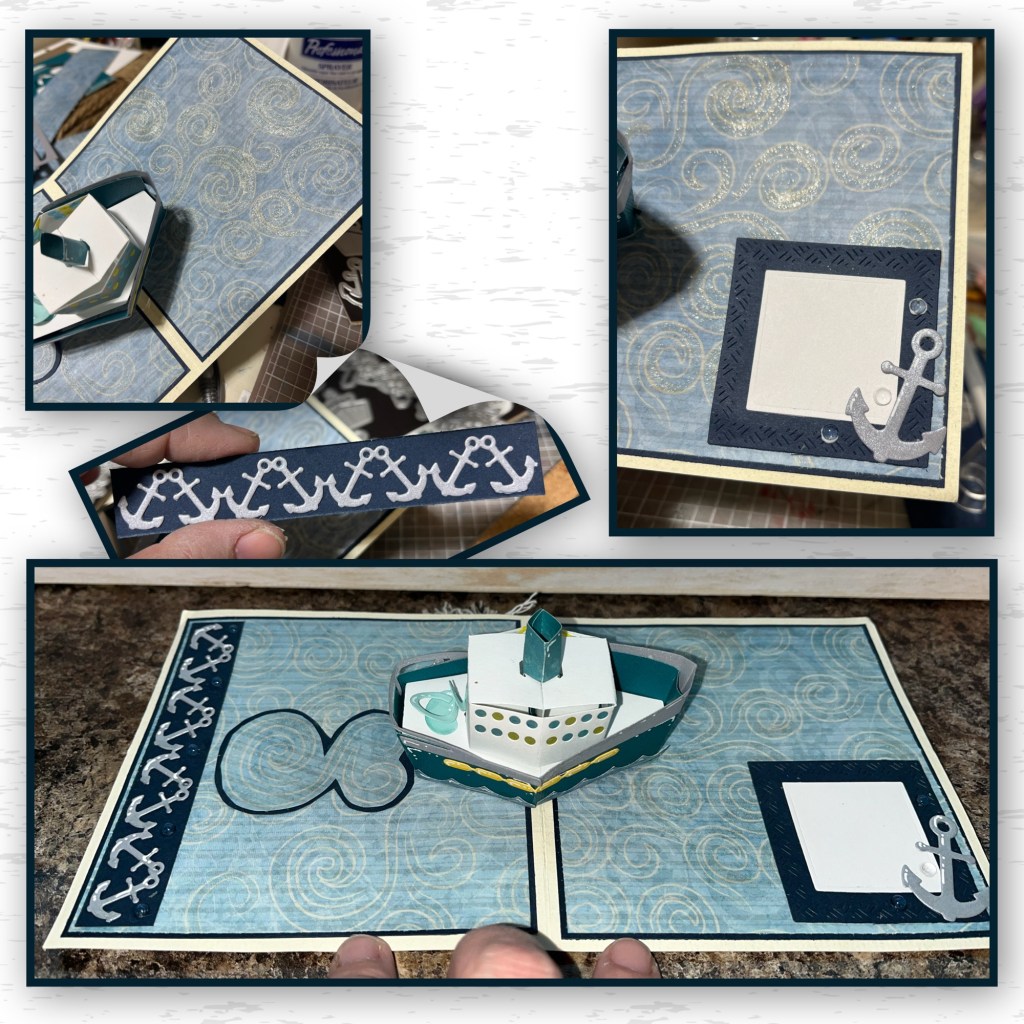
To create the cruise ship I diecut the pieces from the Boat Pop up, and the pieces from the Cruise Ship add on (Karen has a video tutorial on the product page at the link ⬆️ ) I wanted the windows to look like there were lights on, on some of them so I added vellum behind them and coloured some of them yellow and some blue. I added shading with a Versa Mark Marker, and highlights with a white Gelly Roll pen Then finished assembling the cruise ship.

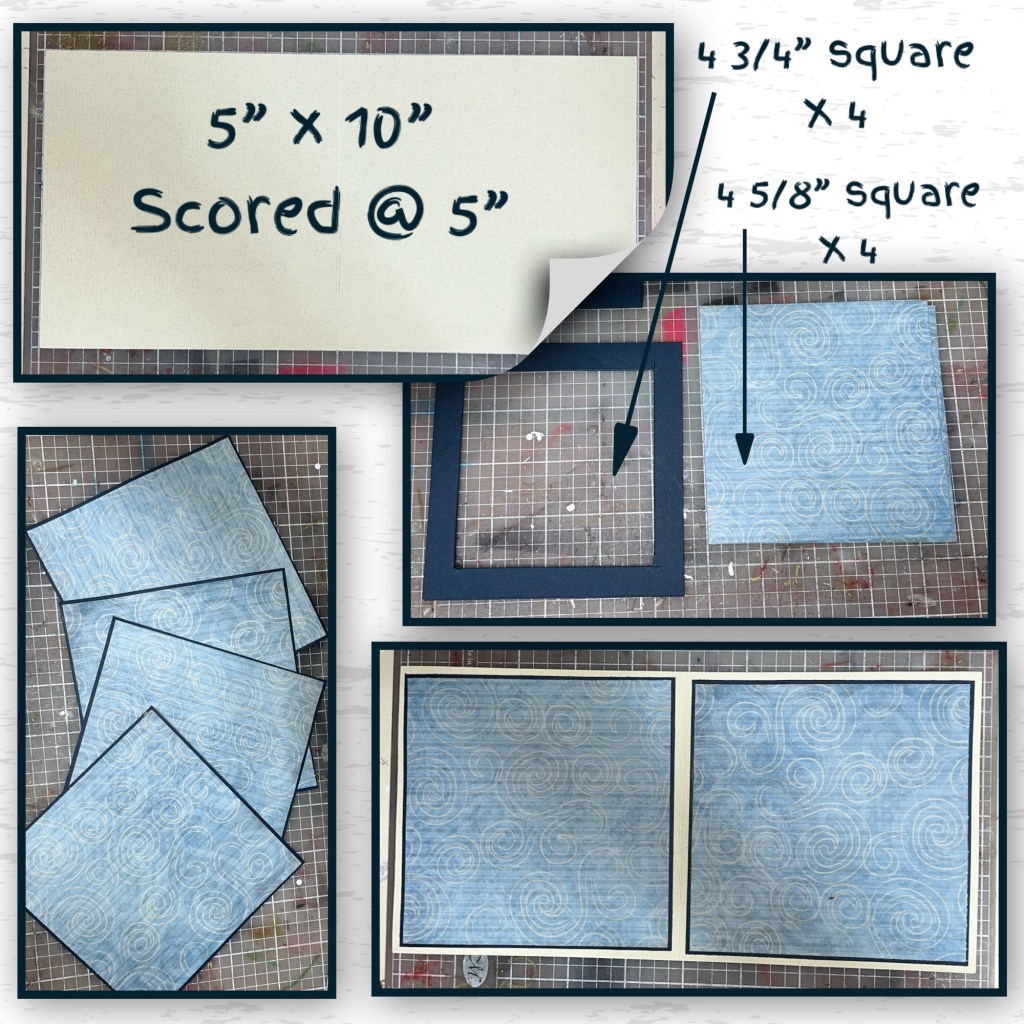
I cut and scored the card base as shown below. I cut and layered the panels and added them to the card base.
When adding the ship to the card I was a little heavy handed with the glue and had some leakage which then tore the pattered paper a bit. So I thought I would make a wake coming out from behind the boat so I cut out a swirling pattern from the left over paper. I layered it over navy so it wouldn’t look lost on the background. I also used a Wink of Stella pen to add some glitter to the swirls.

I decided to add more Wink of Stella to the swirls on the background. I cut a navy border that is 4 3/4” x 3/4” and added the anchor border from Set Sails Border and added to the left side of the inside. I then layered a couple of squares from the Squares Crosshatch and the anchor from the Cruise Charms set.
Here is ooops 2, I somehow managed to get black ink on the top of the card, I don’t even remember using the black ink but yet here we are. I cut a border, dimensions below. I wrapped it with Bakers twine and then unwinded the ends to give it a more fraid look so that it would cover the ink spot. I assembled the ship from the Cruise Charms and set aside. Using the squares cross hatch again I cut a couple layers. Some of the other layers I just cut to be slightly smaller than the crosshatch squares. And layered. I stamped a greeting from Cruise Greetings on the white square.

Adding the square to the card, I added foam adhesive as shown, making sure to leave a space to bridge over the border with the twine. I added another anchor.
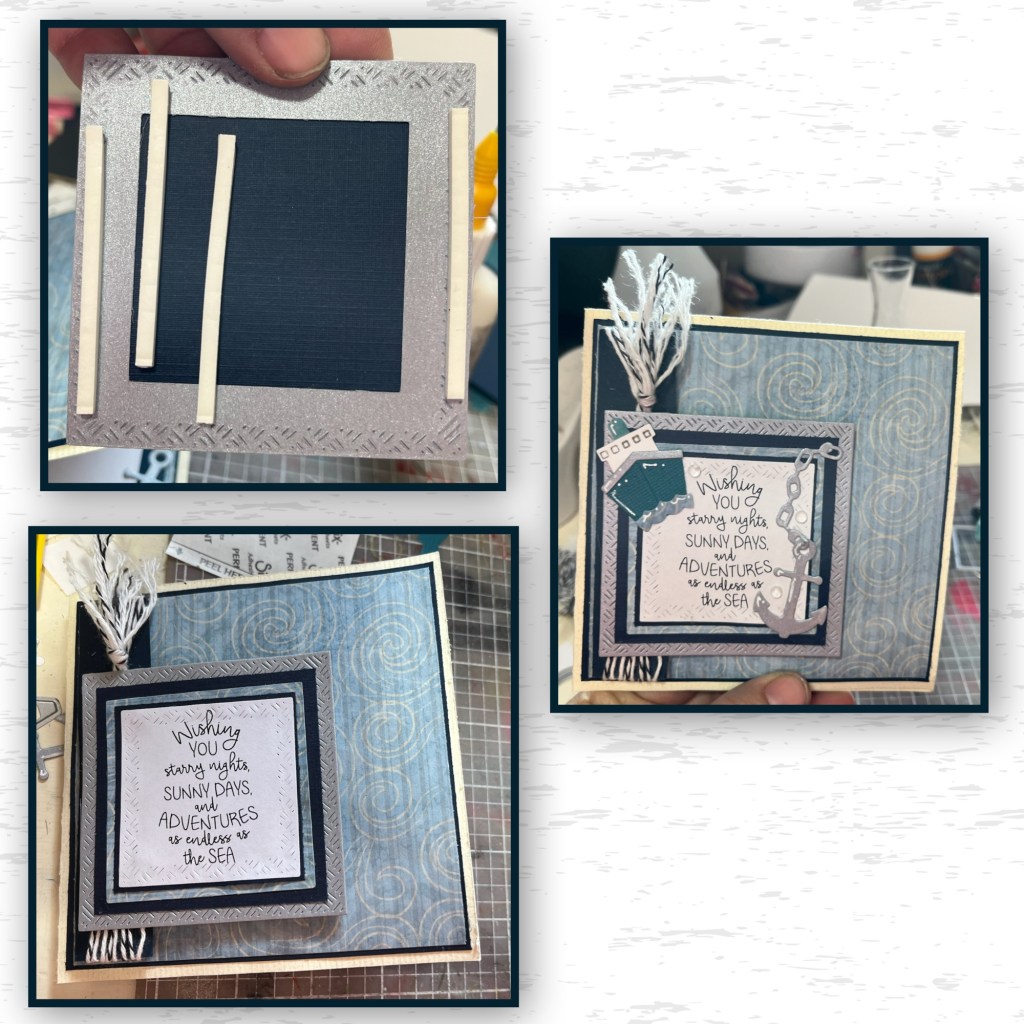
They are hard to see, but I added a few half back, clear bubbles randomly around the borders and the squares.

Other Tools used
