
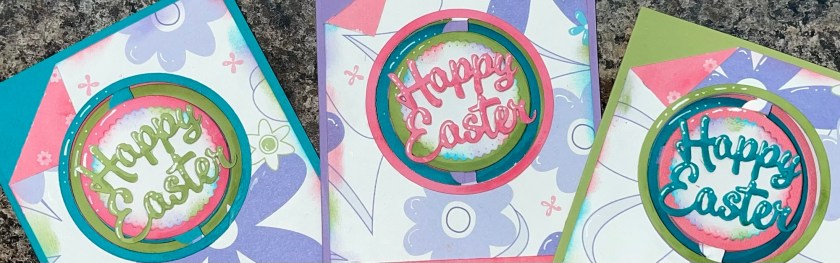
Wow, this is my 50th Craft Roulette submission, its so hard to believe that I’ve made it to 50. Club 52 is just around the corner. I decided to make 3 Easter cards for my grand daughters. When it comes to their birthdays and Christmas they each get their own special card, when comes to Easter, Valentine’s and Halloween I tend to make them the same card but with some slight difference. For this card I used the same colour of card stock but mixed them up slightly differently with each card.
Here are this week’s Craft Roulette parameters.

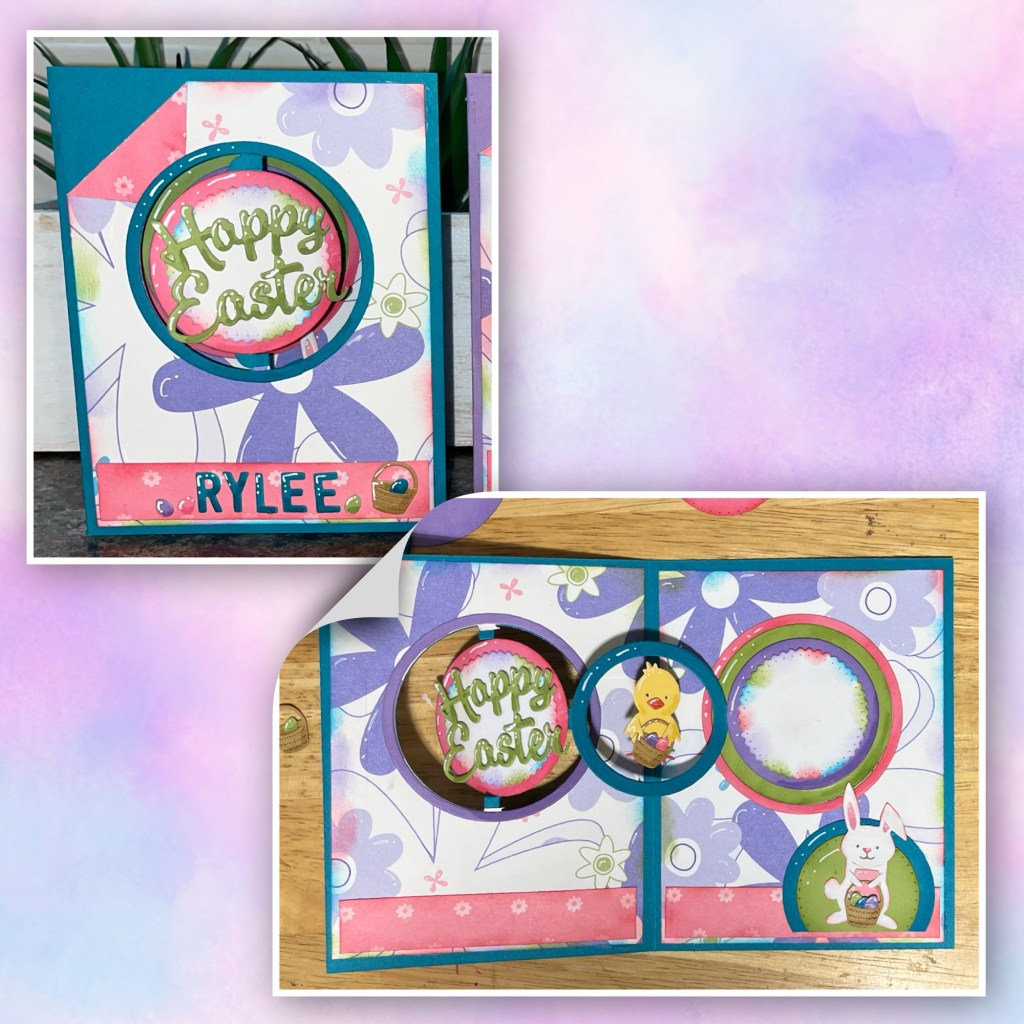
This card has multiple folds but I am counting the main fold and I folded the corner of the patterned paper on the front of the card. I used nice bright jelly bean colours. Math was a bit more difficult but since I made 3 cards I had to multiple every piece by 3, I also had to count all the eggs. I used a Versa Mark marker to add all the shading.
To make the A2 sized cards I cut and folded to the dimensions below. I also cut the patterned paper as shown. It is double sided paper. I decided to use sponge daubers and ink around the edges of all the pieces. On the purple and white side I used 4 different colours. Purple, pink, turquoise, and green. On the pink side I just used pink. I also added white highlights to the flowers on the purple side.

I added the panels to the card base as shown, folding the top left corner of what will be the front. I followed Karen Burnistons video tutorial for her Circle Charm Pop up

I cutout the circle mechanism still following Karen directions.

I cut out several circles and rings using the same Circle Charm Pop Up set. In the photo the middle circles are pink but I decided to use blue.
I started adding circles and rings to the card base.

I die cut and assembled the chick (with an extra chick) bunny, and Easter basket with eggs using dies from the Spring Animals. I cut “Happy Easter” from the Easter Charms dieset, three times and layered . I added shading with a Versa Mark Marker, and highlights with a white Gelly Roll pen. I cut the scalloped white circles using a circle from the Circle Charm Set, and inked the edges as shown. I attached the duck following Karens video, sandwiching a thread between the two ducks, that is tied to the circle that will go behind the one that attaches the front circle to the back.

I diecut the girls names using the Mini Alphabet and numbers and added all the elements as shown.
All 3 cards in the different colour combos


Other Tools used
