

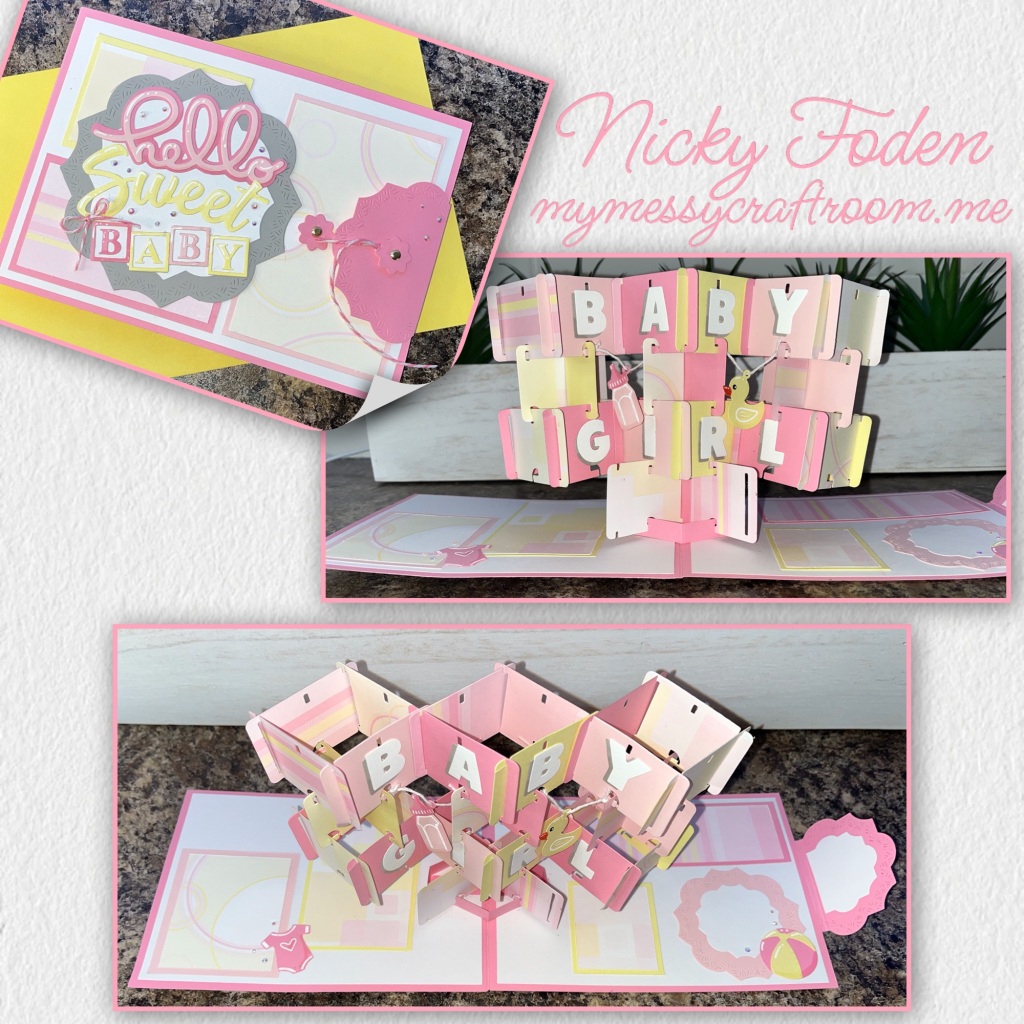
A friend of mine asked me if I could make her a baby girl card. I’m her go to personal card maker lol. She sees all my cards and is one of few who gets to see most of them in person and she is always so excited when I come up with something new. So I knew I had to make something special. She was truly happy to see this card.
All the fun is in the reveal, to see this card in action please check out my FACEBOOK page, feel free to join if you would like to share your own crafty creations. You can also see a video of this card on my INSTAGRAM page.
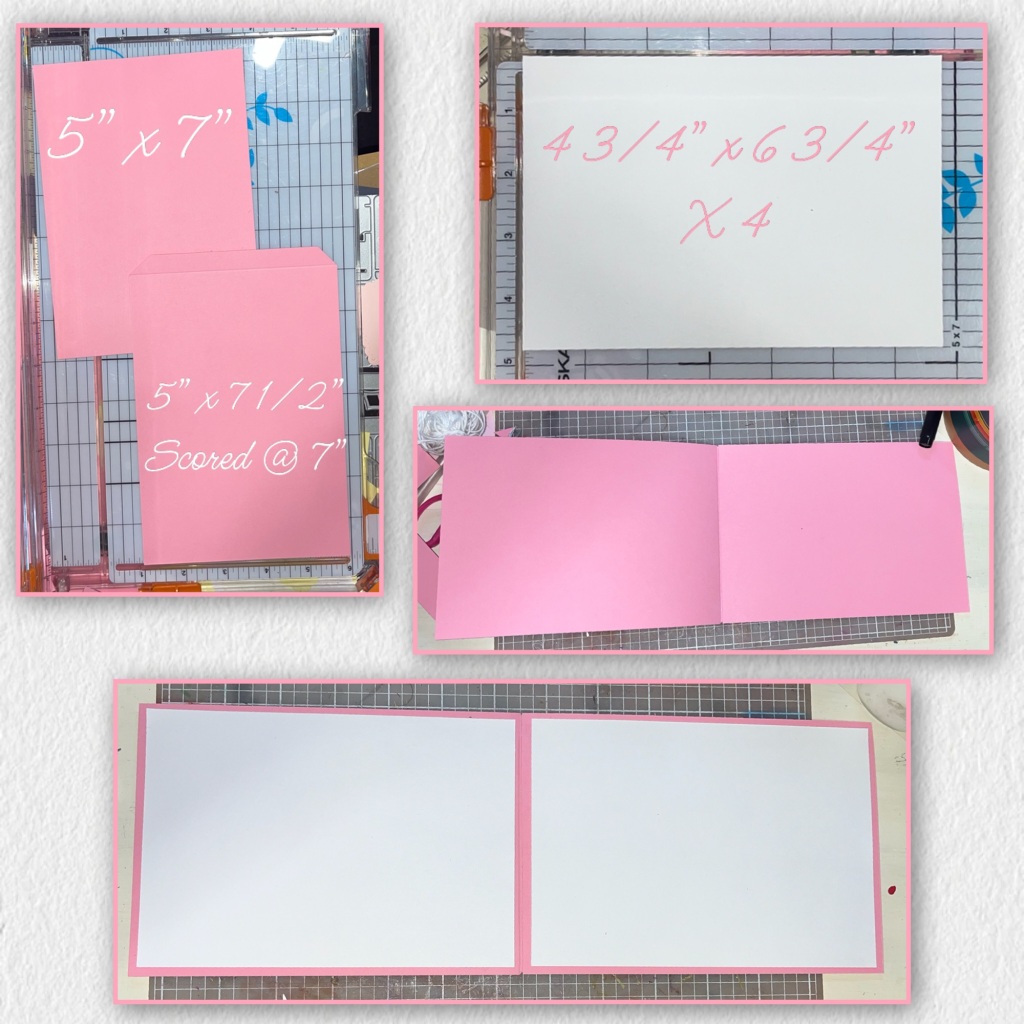
I wanted my House of Cards to be mix patterned paper and matching card stock, but what I had was too thin to use alone so I used Sizzix Double sided adhesive to adhere three different patterned papers (retired Stampin Up) to 3 different cardstock, light pink, dark pink, and yellow.
I assembled the House of Cards as shown (Karen has a video tutorial on the product page at the link ⬆️ )

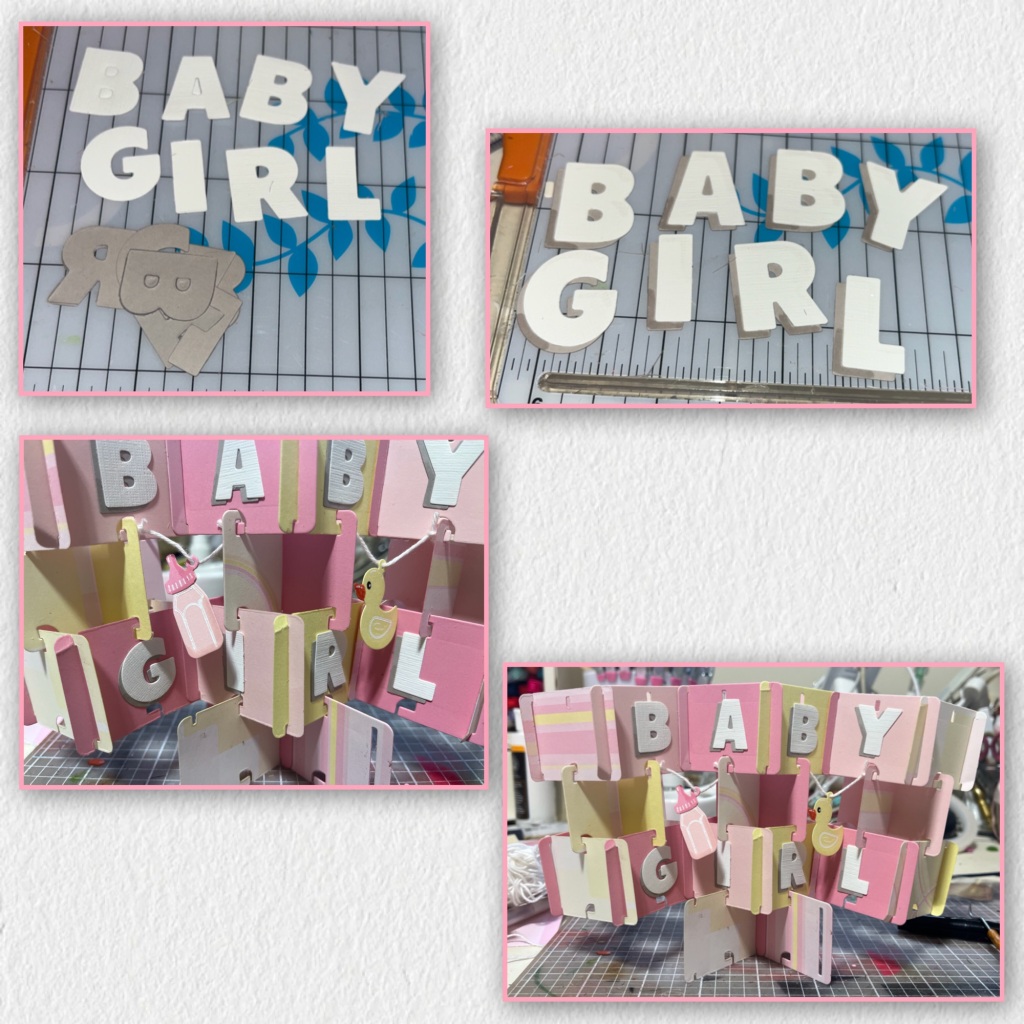
I diecut “BABY GIRL” from white and grey using the Alphabet die set and layered as shown. I assembled the Duck and Bottle from the Baby Charms and added them to the House of Cards as shown below. I used the holes on the bottom of the cards to add the bakers twine used to hang the charms.
Cut the panels for the card base a shown, add the pink ones end to end and add the white panels to the front back and inside.
I added the mechanism for the House of cards, then added the tower that I made.

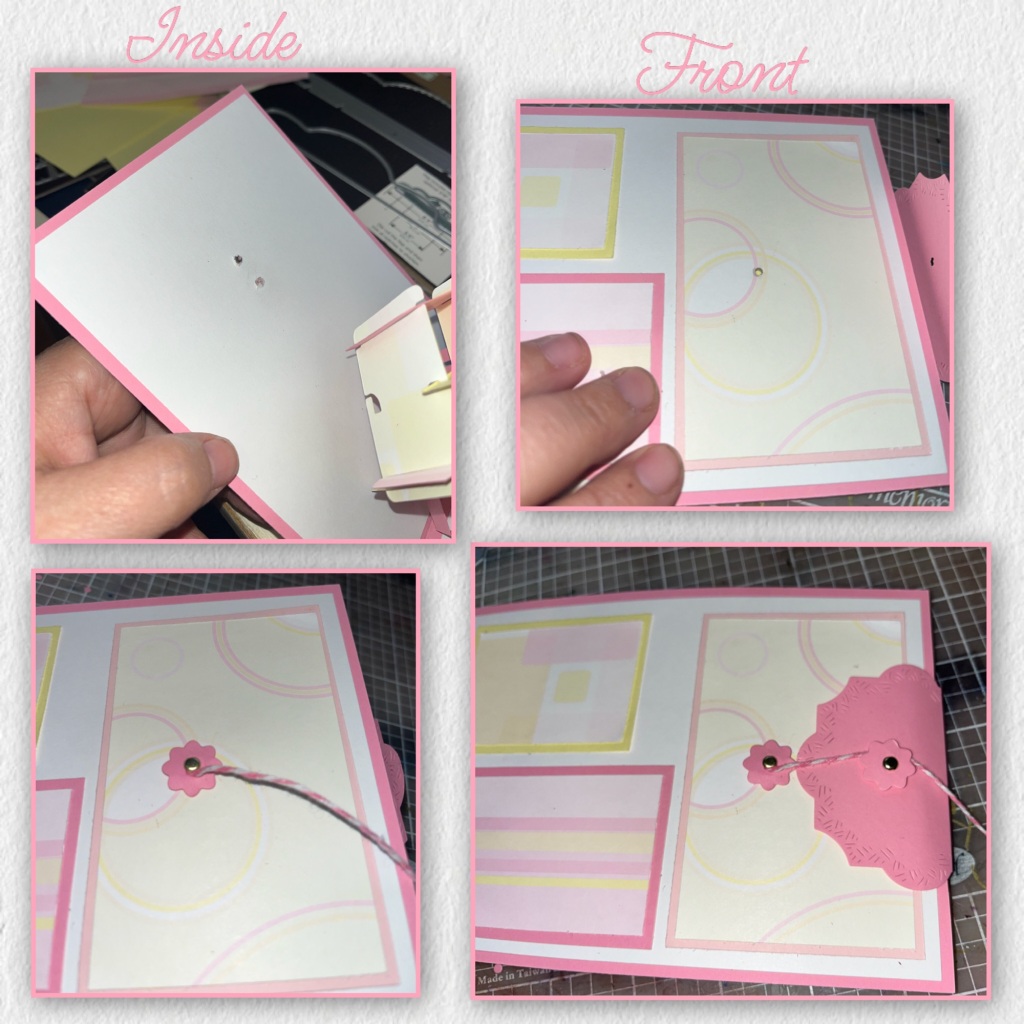
The card didn’t want to stay closed so I decided to make a fun closure. I diecut the middle Labels Crosshatch and scored as shown. I cut the flowers and closure pieces from the Long Flaps and Closures and assembled. Adhere the short part of the label to the back of the card, flap facing forward. I punched holes with a pointed poker as shown.
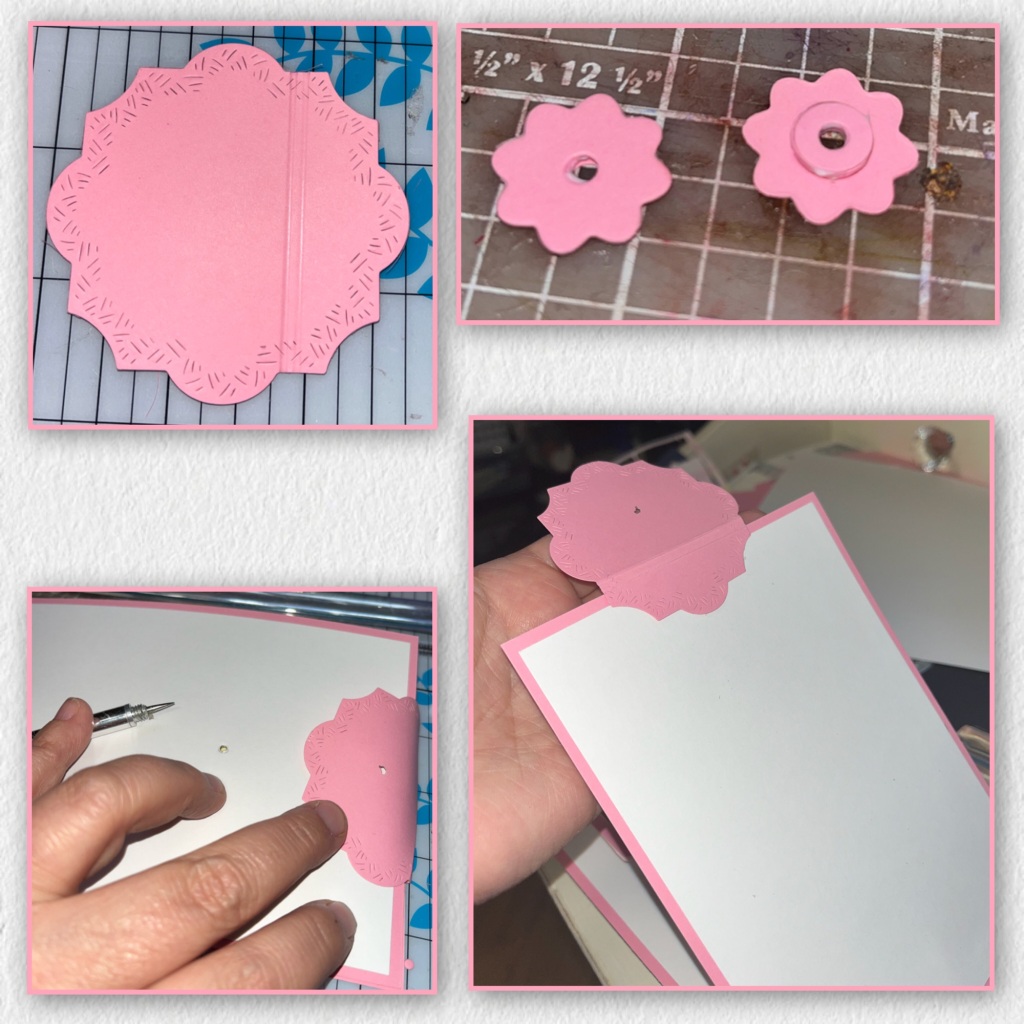
I actually needed to move the hole a little bit. On the front I used some scraps of the patterned paper and matted with the cardstock. I didn’t measure as they were scraps, and they just happened to fit. Add the closure piece with the bakers twine to the card, add the other closure piece to the flap using brads.
Using the largest Crosshatch I cut grey label. I diecut Hello, Sweet, and Baby fro the Baby Charms. I added shading with a Versa Mark Marker, and highlights with a white Gelly Roll pen. I added a matching bakers twine bow and some itty bitty gems.

I added matching Crosshatch Labels to the inside to sign, and one on the back side of the flap to cover the brad that is used to hold down the closure. I added the little sleeper from the Baby Charms and the ball from the Beach Charms. I also added a few gems around the inside.


Other Tools used

Love this! As always, I really appreciate reading all your tips and hints on how to construct your fun interactive pop up cards. Thank you, hope to try this soon!
LikeLiked by 1 person
Well this has me baffled what a lot of wonderful bits n pieces any you make it look so easy on your blog, but the outcome is amazing xx
LikeLiked by 1 person