

I had so much fun making this card. And I love how my little circle flowers turned out. This card was inspired by Craft Roulette and I know that I never would have come up with this card otherwise. Even before I watched the episode I told myself I was going to either use a mechanism I haven’t used in a while or I would use a set that I haven’t used before. With this card I actually did both. Here are the parameters
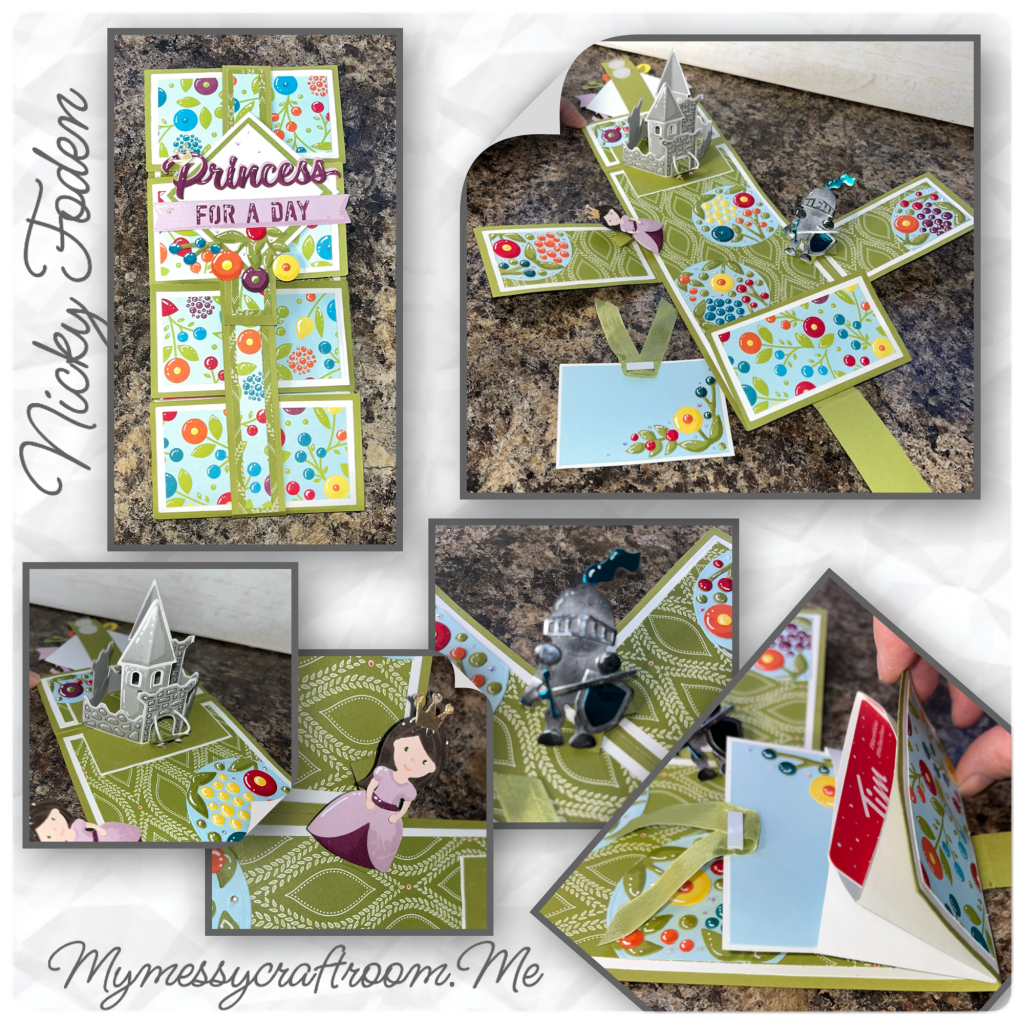
Now I think I was pretty clever with how I used an envelope, I actually cut one in half and made it a gift card holder under the bottom flap. I think the bright colours would be perfect for a party. I have 2 crowns, one on the “P” on the front of the card, and one on the princess that is inside the card. The 3 strips of paper were used to makes the verticle belly ban. Green cardstock, green patterned paper, and flower the paper. So for my personal challenge I used the Slim Flaps and Frames and the Mini Pops for the mechanisms I haven’t used in a while, and the Word set 5- Royalty for the die set I’ve never used before.

All the fun is in the reveal, to see this card in action please check out my FACEBOOK page, feel free to join if you would like to share your own crafty creations. You can also see a video of this card on my INSTAGRAM page.
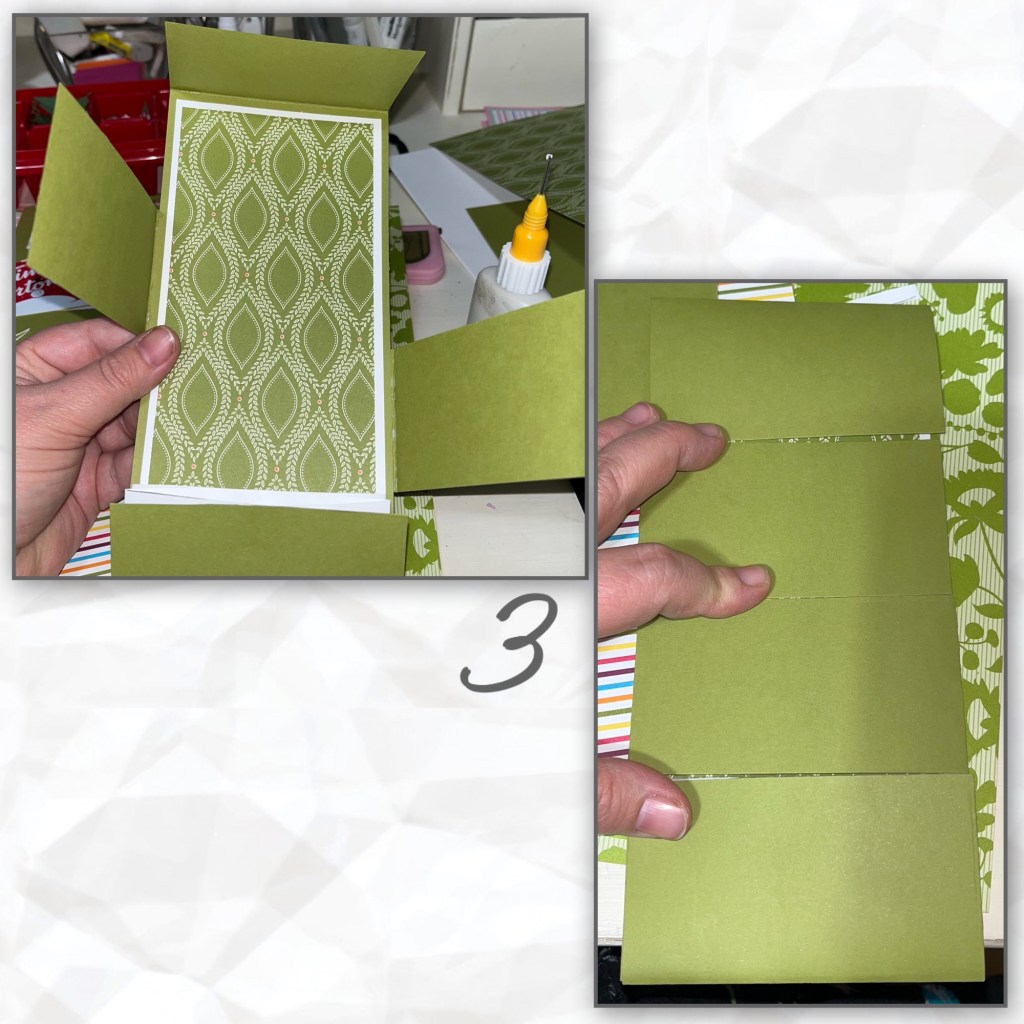
1A- cut the cardbase and panels as shown below
B- layer the panels as shown
C- cut 2 of the flaps that that go over the top and bottom, and the 2 that go over the sides from the Slim Flaps and Frames (Karen has a video tutorial on the product page at the link ⬆️)

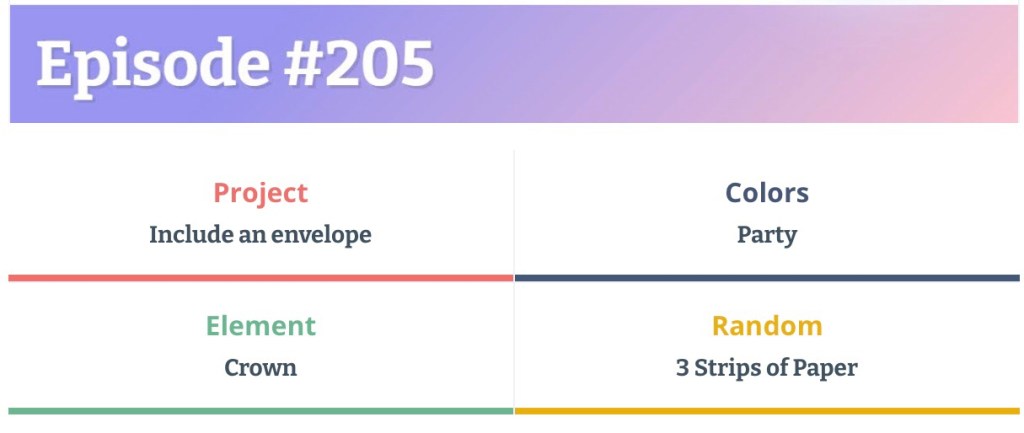
This is how I made the gift card pocket. It is a trick I learned YEARS ago when I was a Stampin Up Demonstrator
2A- choose an envelope, this is about 4” wide and close to 4” tall. Seal the envelope. Turn it 1/4 turn for the next step.
B- I used the green flap that I will have on the bottom to measure how far up I need to cut the envelope in half. It wasn’t quit 1/2 so I used the one that was the correct size to measure where to trim the second one. You should now have 2 pockets that are the same size. Make sure the openings are facing up for the next step.
C- add the bottom green flap to the cardbase as shown.
D- add adhesive to one of the pockets BUT only up the middle where I have the pencil squiggles. Add the other pocket directly over top. Make sure that the openings are both facing up. On the side that will be the back, again ONLY add the adhesive along the middle (on the picture I have the work back where I added the adhesive)
E- add the pockets as shown on the bottom of the card base. Add adhesive up the middle again, I added it over the word front. Then close the flap.
F- the reason I only added the adhesive up the middle is it allows the flap the ability to open a little more than it would if everything was glued edge to edge.
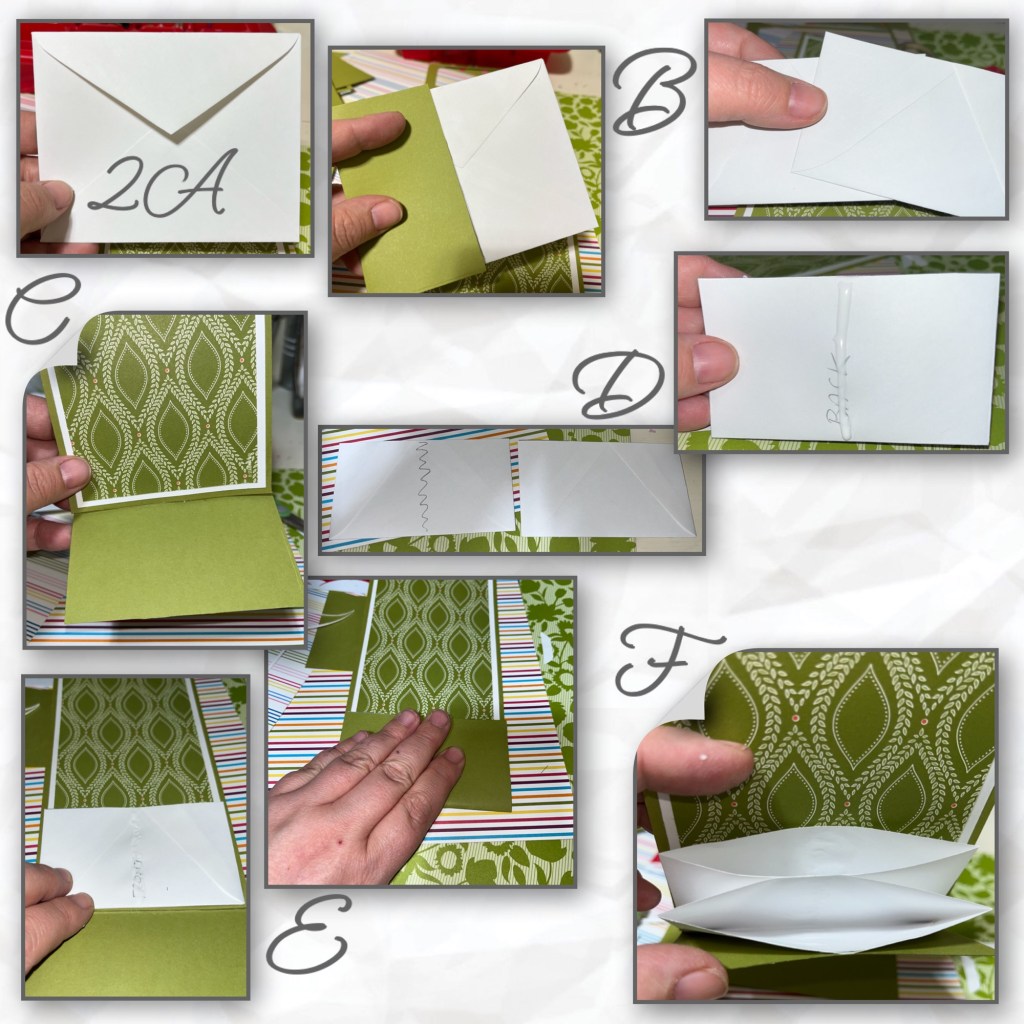
3- add the rest of the flap as shown.
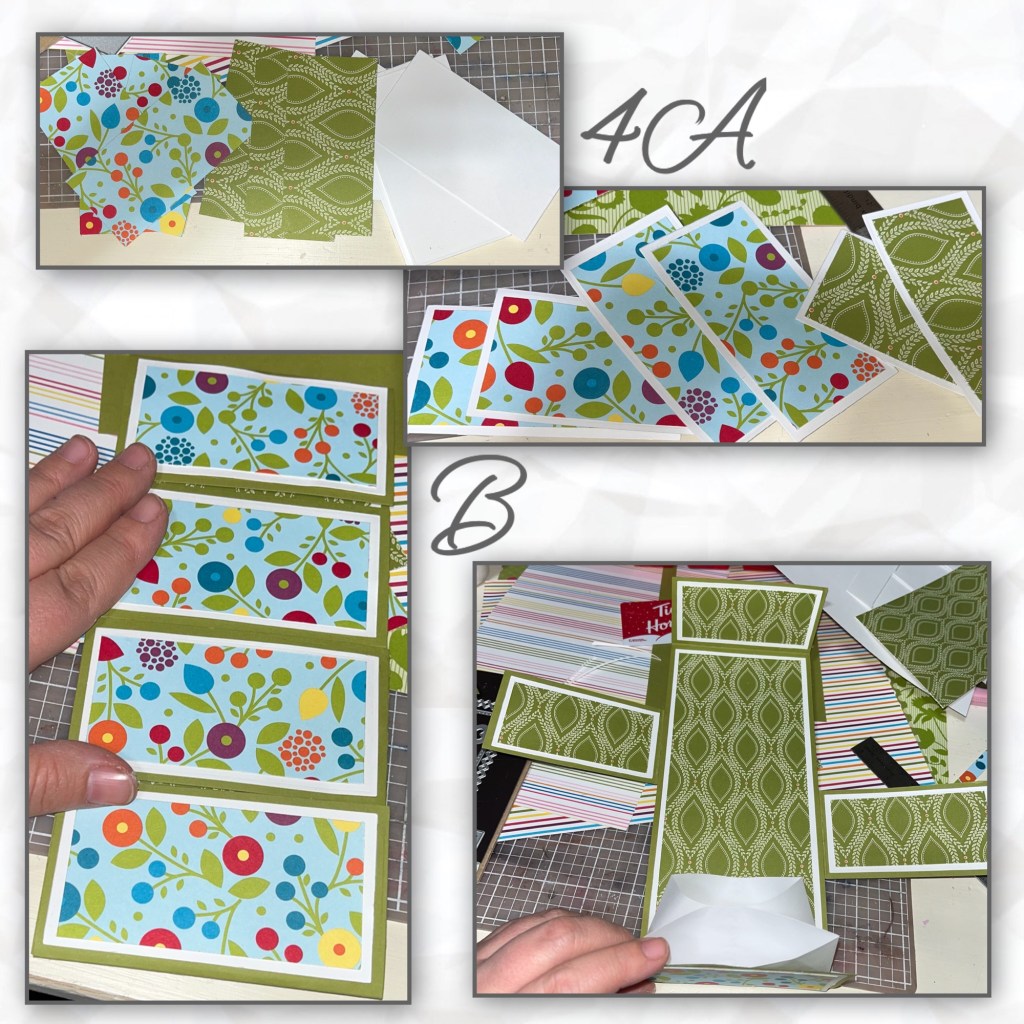
4A- die cut and adhere the panels that will go on the flaps.
B- The flowers will be on the front, the green will be on the inside.
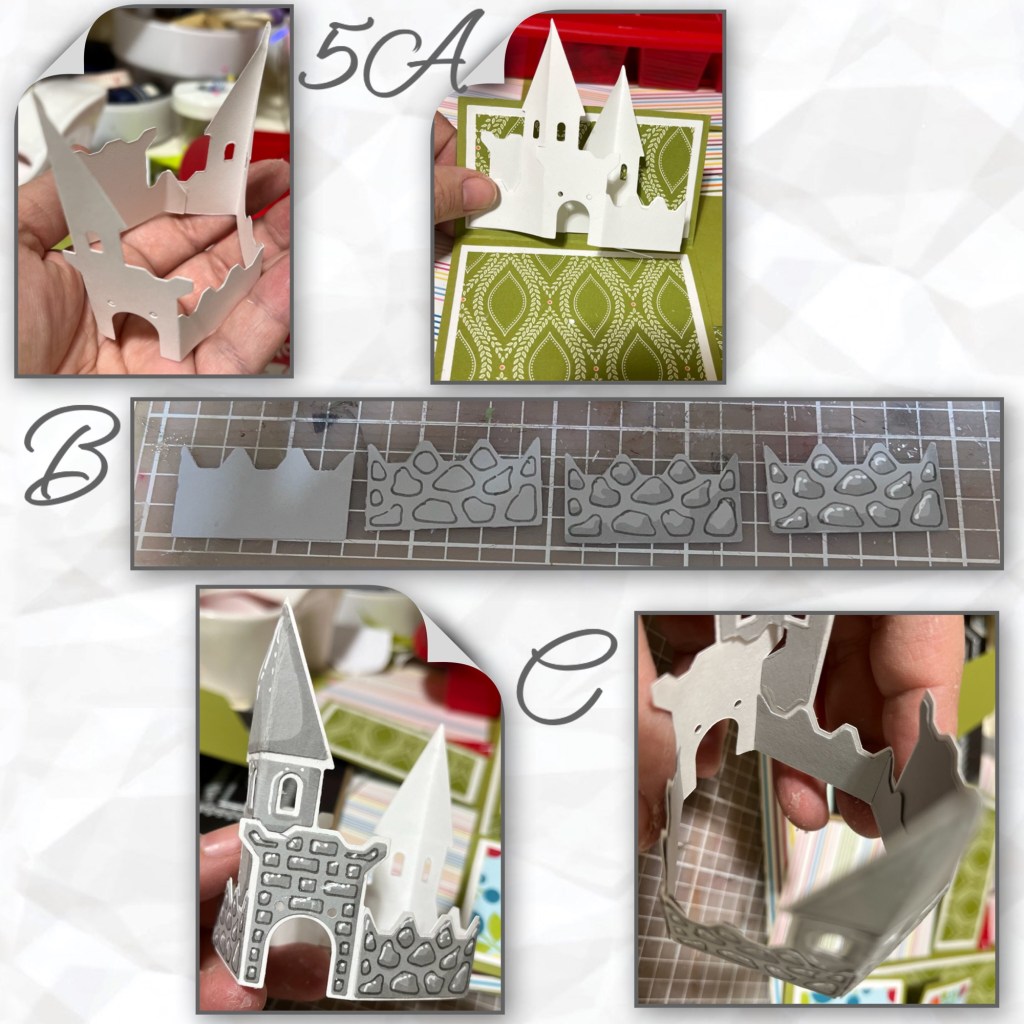
5A- I thought my princess would need a castle, but I wasn’t sure it would fit. So I cut out a white Castle Pop up and checked if it would fit. It does but it does hang below into the area under the second flap. But I’m ok with that. (Karen has a video tutorial on the product page at the link ⬆️)
B- I diecut all the castle layers from grey. I really like the look of the hand-drawn bricks and stones. I use the stencil feature and a grey pen to draw the stones. I added shading with a Versa Mark Marker and highlights with a white Gelly Roll pen. Can you see the difference these extra steps make.
C – I added the pieces to the castle. I put the shaded and highlighted pieces on the outside, and just plain grey pieces on the inside.
Since I hadn’t decided on adding the castle until after I added all the layers to the panels I had to get creative. I also knew I wanted a white layer behind the green layer, and pop up cards don’t always open all the way if you have too many folds in folds.
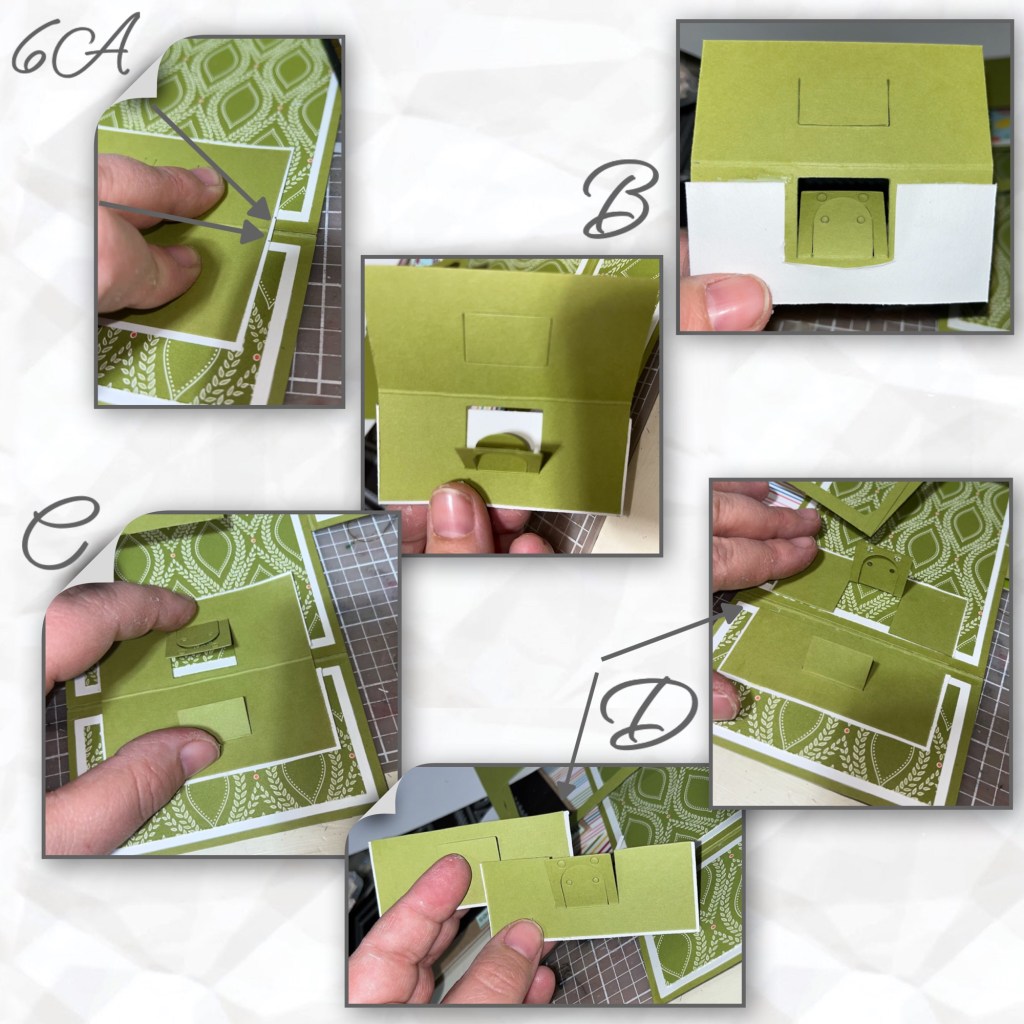
6A- The green piece that the mechanism will be cut into was just a scrap I had laying around and I did not measure it. It has to be big enough to fit the mechanism and score in the middle as shown. I took a white piece of card stock and put it behind the green so it would have matting around the green piece, do not glue it yet. I marked with a pencil where the white mat from the bottom layers meet this new layer and marked it on both pieces. This is how I will make sure my mechanism is lined up properly.
B- Cut the white card stock where you marked it in step 6A, I also cut around under the mechanism pieces so white will not show through the holes when it is in the card. Adhere the white piece to the green piece on both sides.
C- I laid this piece back onto the card making sure that the white matting on the mechanism piece still lines up with the white lines on the mat from the layers below. This has to be spot on before you cut the green piece apart.
D- Cut the green mechanism piece in half. Cut it along the white edge. There will be no white edge on one side. It’ll just be green on the sides facing into the card fold. Match this edge up along the white mat from the layers below. The mechanism should be perfectly aligned to add the castle to.
7A- add the Castle to the mechanism.
B- I added bakers twine to the drawbridge.
C- when closed the castle does go below its flap. So I will have to keep in mind when closing the card the top flap has to be closed before the second flap.

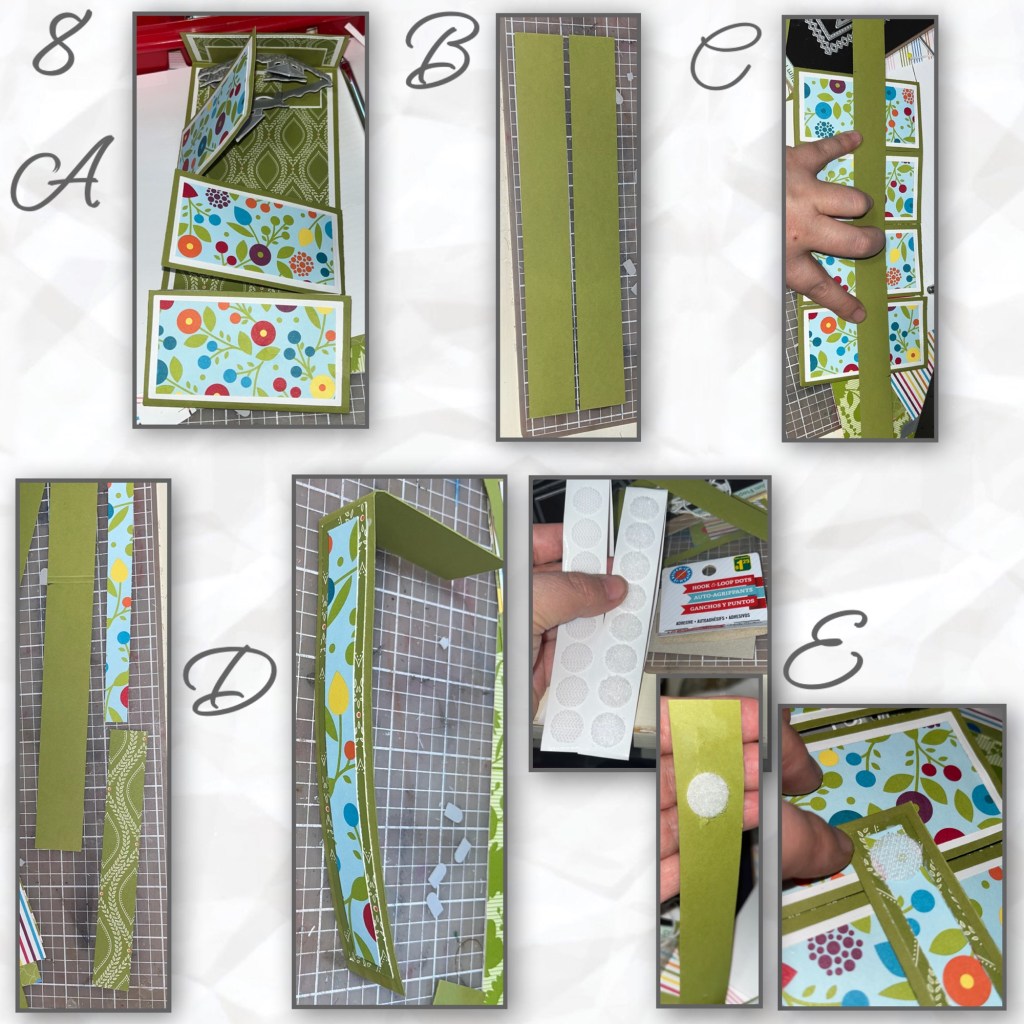
8A- not even decorated, the flaps will not stay closed on their own. This is when I decided it would need a closure. And then I thought this would be the perfect time to work in the three strips of paper.
B- I cut two strips of green card stock 1” inch wide by about 7 1/2 inches long.
C- instead of measuring with a ruler I just overlapped them in the middle the distance I wanted them to be overlapped when closed. I put pencil lines at the top and bottom. I scored on the pencil lines and I also scored about an eighth of an inch above and below to make a gusset, because I know the card will be thick.
D- for the green pattern paper I cut it a quarter inch shorter on the height and the width than the cardstock section, and on the flower pattered paper I also cut it a quarter of an inch from the width and the length from the green paper. Then layered them as shown.
E- I cannot find my magnets, so I thought I would try Velcro. The photo only shows one Velcro dot on each end but I actually used 2 on each end. add the strips to the card, one coming up from the bottom and one from the top, adhering the undecorated end to the back of the card
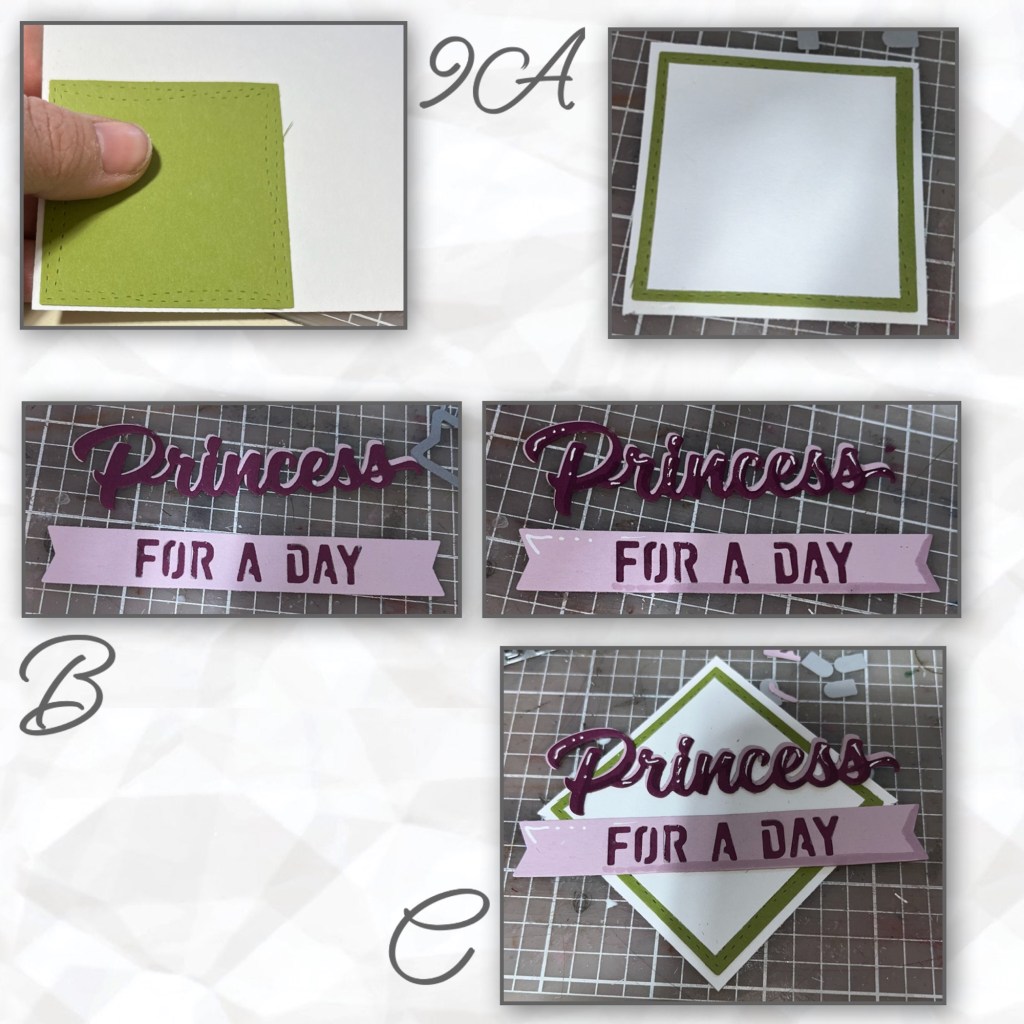
9A- I was running out of this green card stock so I had to go stash diving and I found this precut square. Not sure where it came from but it’s the colour I need. I used it as a reference to cut a white square slightly bigger and one slightly smaller and adhere them together as shown.
B- I diecut Princess for a day using the Wordset 5 Royalty. I added shading with a Versa Mark Marker, and highlights with a white Gelly Roll pen
C- add the words to the square as shown
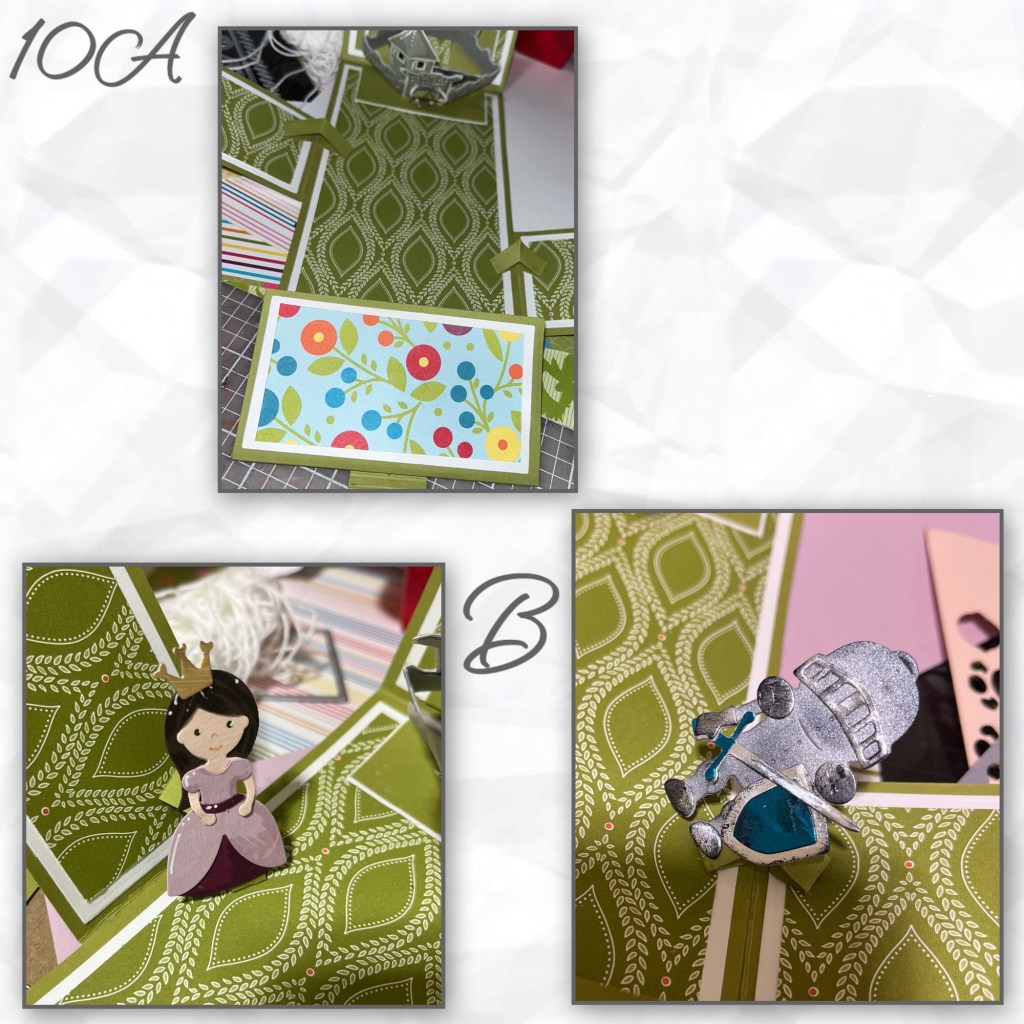
10A- I added 2 Mini Pop mechanisms to the side flaps.
B- I added a Princess to the left pop up, and a Knight to the right pop up.
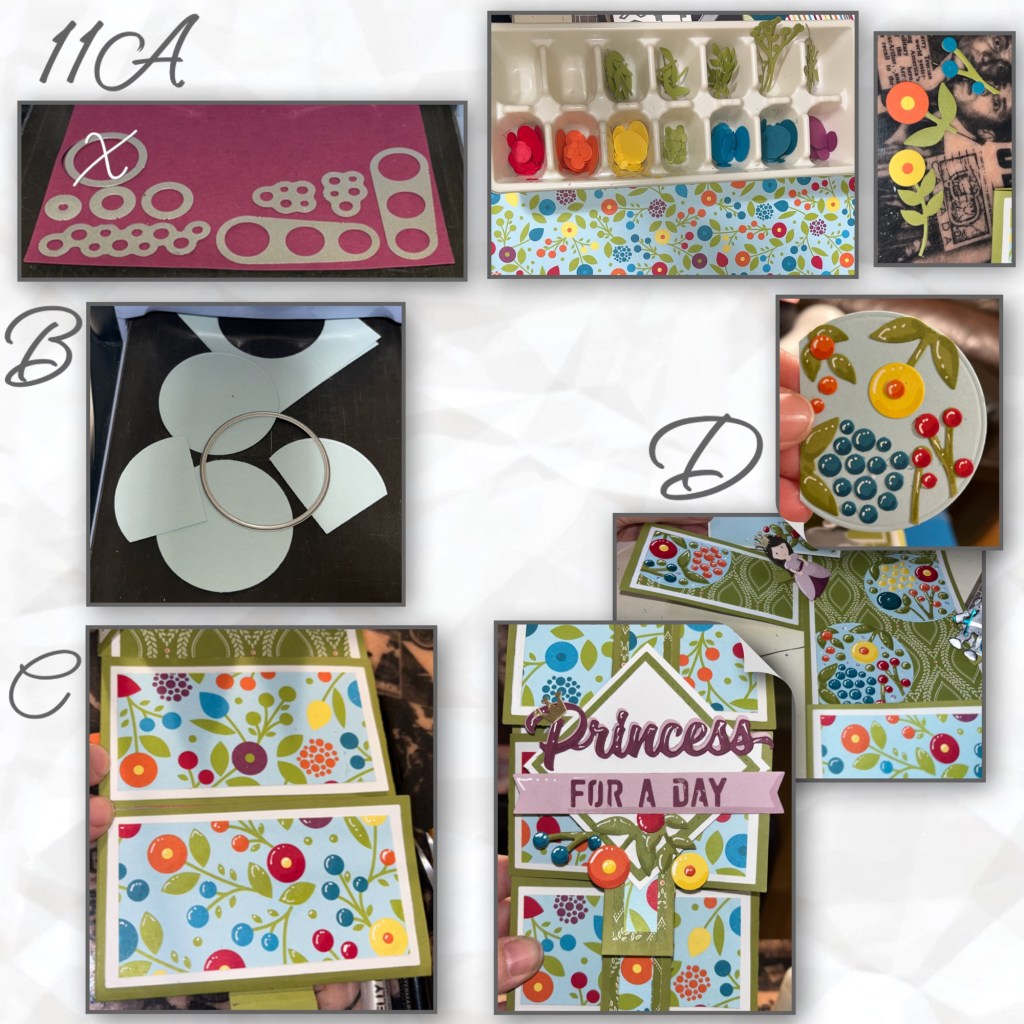
11A- The pattern paper is retired Stampin’ Up! paper. I wanted to make flowers to match so I went through my stash and pulled out the different colours of card stock that I have that match the paper. I use multiple die circle dies to cut out the different size circles. I also cut out leaves and branches from the following sets. Flower Pop up, Woven Basket, Fun Flowers, and Coffee Cup Pop up. Yes I use an ice cube tray to sort my colors. I started assembling flowers to match the flowers in the pattern paper.
B- I used dies from the Circles Crosshatch to cut circle, and sections of circles
C- I really like the look of highlights and shadows, so I added them to the flowers in the patterned paper. In this photo you can see that the top panel does not have the highlights and shadows but the second one does. It’s hard to see in the photo but in person it does add a lot of pop
D- I added the flowers to the blue circles and to the square on the front of the card. I tried to make the flowers look as close to the pattern paper as possible. I added them into the card in different areas.
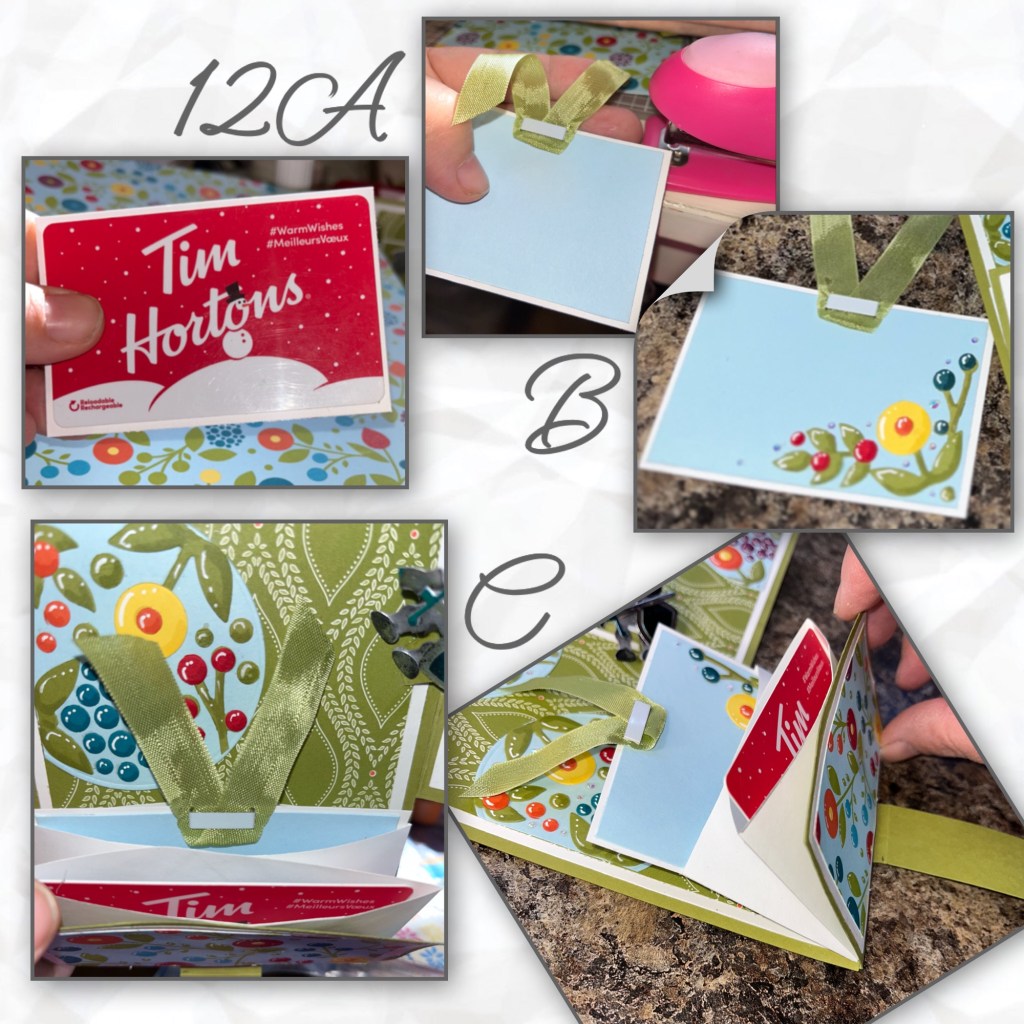
12A- I used a gift card as a reference to cut the white card stock for the card that will go in the pocket. It is roughly a quarter inch bigger than the gift card. I cut a blue piece of card stock about a quarter inch smaller than the white card stock and added it to the white card stock.
B- I used an over size staple to attach a piece of ribbon to the card., I also added some more circle flowers.
C- this is how the gift card and the ribbon card fit in the pockets.
13- I added itty-bitty gems to the front of the card and to the blue circles and the card I made for signing. I also added them to both crowns.

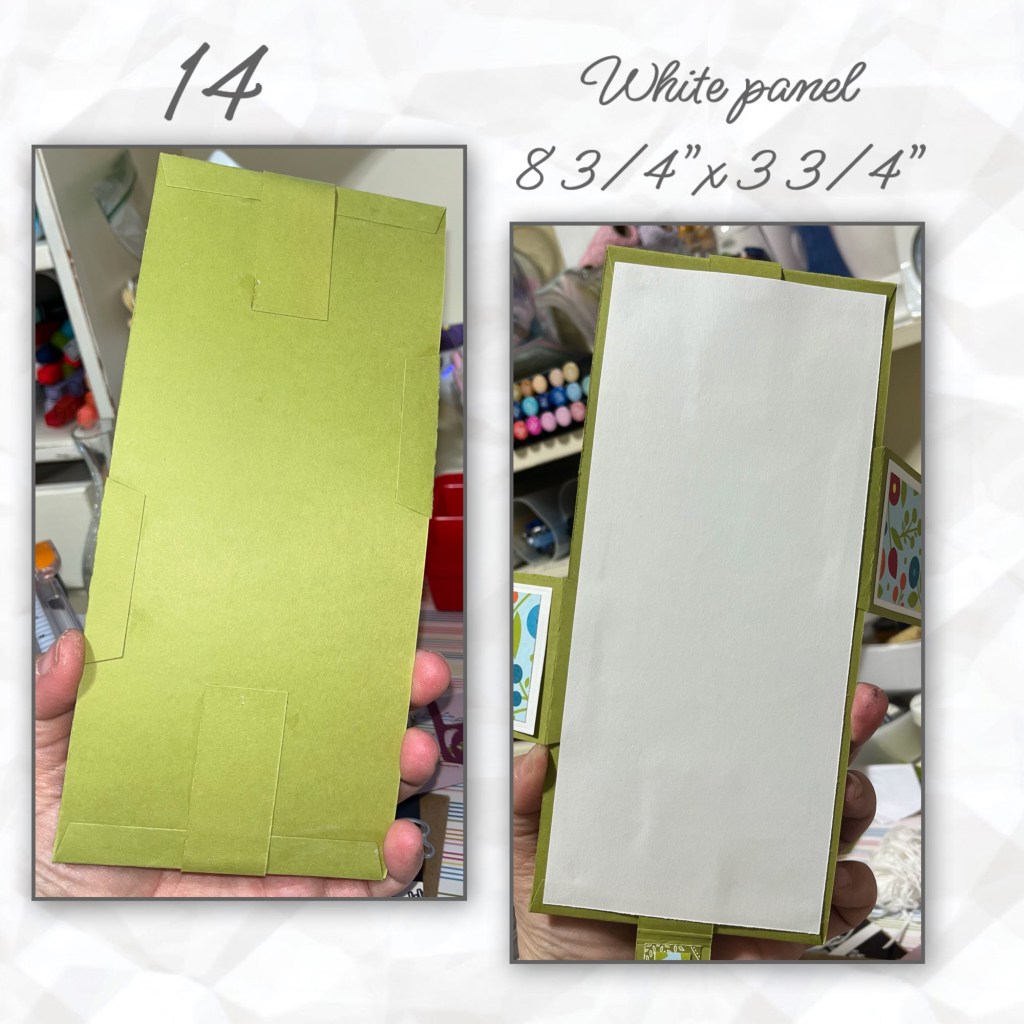
14- The back of the card is kind of ugly since all the flaps attach to the back. So I made a white panel to cover the back.
Other Tools used

This is amazing x
LikeLiked by 1 person